28 February 2008

Baking Class - Bagels & Pretzels.

Lewisburg.

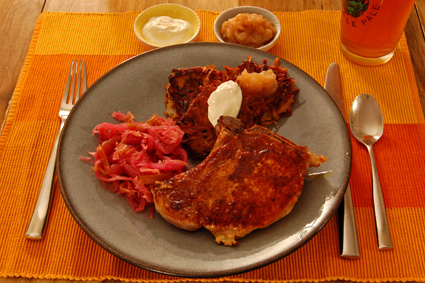
Bagels. There's nothing that can quite match a crispy, chewy, still-warm-from-the-oven homemade bagel. Especially for a group of anxious baking students whose most pressing question is: "How soon can we eat them?"

The answer, of course, is as soon as you can pick them up without searing your fingers, though some of them decided not to wait that long. We made cinnamon raisin, onion, and poppyseed bagels last night, which were an understandable hit. Though I have to admit that I was taken aback by the one who admitted she'd never had a poppyseed bagel before.
BAGELS & PRETZELS
Baking 101 – Spring 2008

ABOUT BAGELS, PRETZELS, AND OTHER PARBOILED BREADS

Bagels and soft pretzels differ from more basic breads in one important aspect of the process: before baking, they are briefly boiled. It isn’t enough to cook them entirely, but works to develop that ideal shiny, chewy crust. Traditional bagels are also often made with less water than traditional bread doughs and given a long rise, making for a stiff dough that produces a dense interior. Modern mass-produced bagels – from the late 20th century on – usually use a short rising time followed by a steaming and baking process that produces a light, soft ring of bread that lacks the traditional crust and texture.

One essential for chewy bagels is a high-protein bread flour. The traditional texture needs lots of gluten, and thus good flour and effective kneading are necessary. It’s really a matter of taste, however, so knowing how it works lets you make bagels just the way you like them. Both bagel and pretzel recipes tend to include a small amount of sweetener, such as brown sugar, molasses, or malt syrup, which has a negligible effect on texture and sweetness, but lends a hint of extra flavor.

BREAD FLAVORINGS

The options for flavoring breads are pretty much limitless. Since white flour and water leave a fairly blank canvas on which to experiment, the simplest path to take is to start adding other flavors that you like and that go together. A few general suggestions:
  • Liquids. You can replace part or all of the water in any bread recipe with just about any other liquid you like, as long as you keep in mind the effects it may have on the texture. Most liquids will have a tenderizing effect, due to the proteins, sugars and acids in them, but do a wonderful job of making any bread more flavorful. Milk, beer, juices and even a small addition of olive oil – as in focaccia or ciabatta – will work in most cases.

  • Herbs and spices. Small particles, such as ground spices, will have little to no effect on the texture of a bread, but can add a great deal of flavor. Even larger particles, such as caraway seeds and rosemary needles, won’t have a significant effect, and can be added without worry; by the time they would begin to have an effect on the bread, the flavor would be overwhelming. Different herbs and spices have different intensities, so start small. For strongly-flavored herbs and spices, start with a limit of a teaspoon per 3 cups of flour; for those that are milder, you can try up to a tablespoon for starters. Until you have a few batches under your belt, use a light touch. Too much or too many flavors in one loaf can make you feel like you’re eating potpourri.

  • Chunks. All sorts of things can be incorporated into a dough for extra flavor, and large pieces are no exception. They will have the effect of making the loaf denser. They interfere with the gluten network by simply getting in the way, and enough chunks can act as dead weight counteracting the expanding gases in the loaf. Just about anything you might eat with bread can go inside it, as long as the pieces aren’t too large – less than ½ inch – and the total amount doesn’t exceed a cup per 3 cups of flour. Some good examples might be: a combination of raisins and chopped walnuts; chopped onions softened in butter; or a mix of grated cheeses.
You can add anything that’s small, like herbs, directly to the flour before adding the liquid to distribute evenly. Larger chunks should wait until the dough has been kneaded, because they can make that process more difficult; add them in at the end of kneading, taking a minute to ensure they’re spread throughout the dough. Flavoring elements can also be added at any point when the dough is being worked prior to baking, or even rolled into a spiral layer inside the loaf just before it goes in the oven.

THE BOILING STAGE

After the bagels or pretzels have been shaped and rested, they’re boiled briefly on both sides before baking. Use a large pot, bringing the water to a vigorous boil, and make sure that you don’t add too many bagels at once. They shouldn’t touch. Pretzels, due to their shape, take up the most space, and require several batches. After boiling, drain on a rack before salting or topping, then bake.

Boiling gelates the starches on the surface and causes the interior to puff up. After draining and topping, they bake in a moderately hot oven to brown the exterior by the time the interior is finished baking. In the oven, the starches on the surface form a thick crust; it limits the bagel or pretzel from expanding much further, keeping the interior dense and chewy. Pretzels are sometimes boiled in water with baking soda added; this helps create a dark brown exterior.
ONION BAGELS
Adapted from How to Cook Everything
Makes eight to twelve bagels

INGREDIENTS
  • 3-½ cups bread flour, plus more as needed
  • 2 teaspoons salt
  • 1 teaspoon instant yeast
  • 2 Tablespoons brown sugar, molasses, malt syrup, or maple syrup
  • 1-¼ cups water, room temperature, plus more as needed
  • ½ cup minced onion, plus another teaspoon for topping
  • 1 Tablespoon butter or oil
DIRECTIONS
  1. Saute the ½ cup onion in butter or oil over medium heat until softened, about ten minutes. Set aside to cool. Meanwhile, thoroughly mix together the flour, salt and yeast in a large bowl. In another bowl, mix together the water and sugar until completely dissolved.

  2. Mix together the flour mixture and the water with a wooden spoon until combined. Turn out onto a lightly floured board and knead until smooth and elastic. The dough should remain just slightly tacky, but not wet. Add the cooked onion and knead for another minute to distribute it evenly. Transfer to a bowl, cover with plastic wrap, and let rise until doubled, about 2 hours.

  3. Turn back out onto a lightly floured surface and punch down gently. Cover and rest for 10 minutes. Cut into eight to twelve equal-sized pieces – whether you want large or small bagels – and roll each into a ball. Poke a hole through the center and stretch into a bagel shape. Cover and let rise for another 30 minutes.

  4. Bring a large pot of water to boil, and preheat the oven to 400° F. Without crowding, drop the bagels into the water one at a time. Boil for one minute on each side, then remove to a rack to drain. Repeat with as many batches as necessary.

  5. Lay the bagels on a greased or non-stick baking sheet. Brush or spray the bagels with a little water and top with the remaining teaspoon of minced onion. Spray the inside of the oven with water to create steam and slide the baking sheet inside. Bake 5 minutes, then spray the oven again. Bake another 18 to 20 minutes, or until the bagels are nicely browned.
NOTES
  • Omit the onion for plain bagels; replace with ½ cup raisins and ½ teaspoon of cinnamon for cinnamon-raisin bagels.

  • For poppy seed, sesame seed, or other sorts of toppings, just brush or spray the tops with water and sprinkle on the desired amount before baking.

SOFT PRETZELS
Makes eight to twelve pretzels

INGREDIENTS
  • 4 cups bread or all-purpose flour
  • 1 Tablespoon brown sugar
  • 1 Tablespoon kosher salt, plus more for topping
  • 1 teaspoon instant yeast
  • 1 ½ cups water
DIRECTIONS
  1. Mix together the flour, brown sugar, salt and yeast in a large bowl. Add in the water, stirring to make a smooth dough. Turn out onto a floured board and knead until the dough is smooth and elastic. Transfer to a bowl, cover, and let rise for about one hour.

  2. Divide the dough into twelve equal pieces. Roll each out into a long cylinder, then twist into a pretzel shape. Keep the dough covered when not working it to prevent it from drying out. Set each shaped pretzel on a baking sheet dusted with cornmeal, cover, and allow to rise another half hour.

  3. Preheat the oven to 425° F. Bring a large pot of water to a boil. Being careful not to crowd them, add the pretzels to the water and boil for one minute on each side. This may take four or more batches, depending on the size of your pot and your pretzels. Transfer the boiled pretzels to a rack to drain.

  4. Arrange the pretzels on a baking sheet dusted with cornmeal. Spray or brush lightly with a little water and sprinkle with kosher or coarse salt. Bake for approximately 20 to 25 minutes, until golden brown. Cool on a rack.

21 February 2008

Epi.

Lewisburg.

Also baking-related: I'm almost to the point where I think I can say, with confidence, that I can make an acceptable epi1:

Epi loaves

My technique needs some tweaking, and a home oven - i.e., not a steam-injected professional model - might not produce the perfect crust, but I'd be willing to serve this to dinner guests. It certainly tastes good, and it's not the sort of thing readily available around here.

Incidentally, the texture and crust here make me think I've just about figured out ciabatta, too. By accident.

* * * * *

1Classic french harvest loaf that's shaped to look like an ear of wheat. It's essentially a cross between a baguette and dinner rolls.

Baking Class - Sweet Breads.

Lewisburg.

And, for those who feel like making cinnamon rolls at home, here's the information from the second baking class. It was a blast watching the students make their own cinnamon rolls, but nothing beat the moment where they decided that these didn't need any icing. They'd brought some, just in case - and left it behind when they took their piles of goodies home.
SWEET BREADS
Baking 101 – Spring 2008

ABOUT SWEET BREADS

Sweet breads are, as the name implies, a group of breads with a distinctly sweet flavor from a significant amount of added sugar, often 10% or more the weight of the flour in the recipe. The addition of sugar, as well as other common ingredients such as milk, butter, and eggs, has a definite impact on the structure and other qualities of baked goods. Sweet breads are still yeasted breads, and behave in much the same way, but with differences worth examining.

SUGAR

Sugar does more to baked goods than simply make them sweet. Though some non-sweet bread recipes call for a small amount of sugar that has little effect other than flavor, the amounts that occur in typical yeasted sweet breads are enough to make a significant difference in several ways. Sugar inhibits gluten formation by diluting the flour’s proteins. Combined with sugar’s tendency to absorb moisture, and to hang onto it, this means that sweet breads are more tender and slower to go stale than other breads.

High proportions of sugar also limit the activity of the yeast in the dough. Sugar’s affinity for moisture dehydrates the yeast cells, and so sweet bread recipes often call for larger quantities of yeast, longer rising times, or both. The sugar also makes these breads more prone to browning early in baking, and so many recipes use lower baking temperatures to prevent the outside browning before the interior is set.

There are several varieties of sugar common in baking:
  • Granulated or white sugar. Common table sugar, it’s almost pure sucrose. It has very little flavor, until it begins to caramelize, which makes it an ideal choice for times when you want other flavors to shine.

  • Superfine or castor sugar. This is the same as granulated sugar, except that it’s been ground finer, making it easier to dissolve in certain special situations. It is not, however, as fine as...

  • Powdered or confectioners’ sugar. This is sucrose that has been ground into dust; labeling such as X, 6X or 10X refers to increasingly fine gradations. To prevent these very finely ground crystals from absorbing moisture and fusing solid in the package, they’re mixed with cornstarch. For this reason, powdered sugar is not interchangeable with granulated sugar in recipes; the effects of the cornstarch are not always desirable when not specifically called for.

  • Brown sugar. Made by mixing white sugar with molasses, brown sugar is available in light brown and dark brown. The dark, with more molasses, has a stronger flavor. Brown sugar tends to clump as it dries because the molasses acts almost like glue; place anything moist – an apple slice, a piece of bread, a wet cotton ball - in the container to soften it.

  • Turbinado, demerara and other “raw” sugars. These sugars, in varying shades of brown and degrees of fineness, are forms of unrefined sugar. The impurities that make up molasses have not been removed, but are still part of the crystals; they’re inside, not outside, and so less prone to clumping. Less processing also means that they tend to have a more complex flavor than regular brown sugar.

  • Honey. Made by bees, honey is a saturated sugar solution containing more than 20 different sugars, various amino acids, enzymes and other compounds. It is sweeter than table sugar by 20% or more, depending on the variety, and its approximate 17% moisture content must be taken into account when baking.

  • Maple syrup. Like honey, using maple syrup as a sugar replacement requires adjustments to the quantity of liquid in the recipe; maple syrup is approximately 34% water. Supermarket syrups rarely contain even a trace of true maple syrup, but are rather made from corn syrup with artificial colorings and flavorings. They are not interchangeable with maple syrup in recipes.

MILK

Like sugar, milk has more effect in baked goods than just adding flavor. Since it contains a variety of proteins and, depending on the type of milk, often some amount of fat, exchanging it for water will make a difference. The proteins and fats in milk work to weaken the gluten network in breads by interfering with the gluten molecules. This produces a more tender crumb, and the presence of fats can slow the staling process.

BUTTER

Butter is almost all fat, but not so much that it is always interchangeable with pure oils or fats in recipes. Depending on the type of butter, it’s usually about 80% fat, 16% water, with the rest being proteins, lactose, and some other trace components. European-style butters are often closer to 85% fat, making them useful for certain tasks, not to mention more flavorful. Cultured cream butter has been slightly soured, producing a more full-flavored butter that is otherwise interchangeable.

Most baking recipes call for unsalted butter; salted butter contains between 1 and 2% added salt as a means to prevent microbial growth and to keep the butter from turning rancid. This works out to around 1 to 2 teaspoons of salt per pound of butter. It’s not enough to make a significant difference where small amounts of butter are called for, but it is enough to make puff pastry too salty. If you don’t have any unsalted butter, reduce the amount of salt in the recipe by about a teaspoon per cup of butter.

In bread recipes, butter works like other fats, as a tenderizer; its salt content, in most cases, makes little difference to the final product. Butter does, however, bring a lot of flavor to baked goods, even in relatively small quantities.

EGGS

Although eggs can do some pretty phenomenal things in baking, their main use in bread baking is as a tenderizer. They contain a large proportion of proteins and fats, both of which interfere with gluten formation, resulting in a more tender texture. They also lend flavor and a distinct richness to many breads, which other ingredients can’t quite replicate.
CINNAMON ROLLS
Adapted from How to Cook Everything
Makes one dozen

INGREDIENTS
  • 2-½ cups all-purpose flour, plus more as needed
  • 1-½ teaspoons instant yeast
  • ½ teaspoon salt
  • 1/3 cup sugar
  • 2 Tablespoons butter, melted, room temperature, plus more as needed
  • 1 large egg, lightly beaten
  • ½ cup milk, plus more as needed, room temperature
  • ½ cup brown sugar
  • 2 teaspoons cinnamon
  • Zest of an orange (optional)
DIRECTIONS
  1. Combine the flour, yeast, salt and (white) sugar in a large bowl and mix thoroughly to combine. Add the melted butter and egg and stir until combined, then as much of the milk as required to form a dough. Turn out onto a lightly floured board and knead until the dough is smooth and elastic, 5 to 10 minutes. Smooth the dough into a ball.

  2. Butter a bowl and place the dough in it. Cover and let rise until doubled, 2 to 3 hours. Turn back out onto a lightly floured board and gently roll into a rectangle, approximately 3/8-inch thick. Brush liberally with melted butter, then cover with an even layer of brown sugar, cinnamon and orange zest. Roll it up, slice into twelve pieces, and place in a buttered 12-compartment muffin tin. Cover and allow to rise another hour.

  3. Preheat the oven to 400° F. Brush the tops of the rolls lightly with a little melted butter and bake until well browned, 20 to 30 minutes. Allow to cool for several minutes in the pans, then transfer to a rack to cool.
NOTES
  • These are best served warm. If they can’t be served right away, place them in a foil-covered baking dish and reheat them in a low oven until just warmed through.

14 February 2008

Baking Class - Yeast Breads.

Lewisburg.

Last night I taught my first baking class. Overall, I think it went well. We didn't make too much of a mess; the loaves we baked in class came out well - enough that the students were amazed such simple bread could be so good; and all six students were planning to return today to bake the loaves they'd kneaded last night.

And I have to admit that I was deeply amused as I watched the students attempt kneading for the first time. It's been so long since I learned that I can't remember it, though I do recall it taking years of practice until I stopped using too much flour. There's some learned knack there, I guess.

But, for those who're interested, here's the text of last night's handout:
YEAST BREADS
Baking 101 – Spring 2008

THE BREAD-MAKING PROCESS

Making bread is perhaps the simplest and most forgiving baking process. With a little time and effort, even novice bakers can turn out loaves of homemade breads superior to any you might find in the grocery store. The process is simple and straightforward, often quite forgiving of mistakes and easily adaptable to experimentation. There are as many methods out there as there are breads – and that’s no small number – but as follows is the general method for most western-style yeast breads:

MIXING combines the dry and wet ingredients – the basic four being flour, water, yeast and salt – into a dough. KNEADING works the dough, stretching and organizing the proteins in the wheat flour to develop the gluten network, while also aerating the dough with many tiny bubbles. RISING allows the yeast in the dough to grow and reproduce, producing the carbon dioxide that allows the loaf to rise and various other products of fermentation that change the flavor and texture of the dough. PUNCHING DOWN gently redistributes the yeast cells, their food supply, and the gas bubbles in the dough for the second rise. PROOFING, or the second rise, allows the dough to rise once more in the shape for baking. BAKING causes the loaf to rise dramatically as the water and alcohol in the loaf expand the gas pockets; the starch structure in the loaf absorbs water and gelates; and the bread’s structure sets, starting at the crust and working inward to the center of the loaf. COOLING allows the excess moisture in the loaf to escape while the loaf firms up, making it easier to slice.

FLOUR

There are many different types of flour to choose from when baking. Though breads can be made from almost any grain, only wheat and its closely related cousins are capable of producing gluten, the protein structure that allows a loaf to rise. Some typical flours include:
  • All-purpose flour. Like most flours, it is often made from a mixture of different wheats blended to give consistency, particularly in protein content. The bran and germ of the wheat kernel have been removed, leaving mostly starch, about 11-12% protein, and a very small amount of fats, enzymes, and other components. For many types of baking, all-purpose flour does a good, though not always spectacular, job.

  • Bread flour. A high-protein version of all-purpose flour, bread flour contains 12-13% protein, with most of that representing strong gluten proteins. The higher proportion of protein makes for the lighter, chewier loaves of bread. Bread flour can also absorb more water than other flours, which can affect the workability of the dough.

  • Pastry flour. For baked goods that require a soft, tender texture, low-protein (8-9%) pastry flour contains weak gluten proteins and runs less risk of producing a tough dough or batter.

  • Whole wheat flour. With much of the germ and bran still in the flour, whole wheat flour has much more flavor than white flours; however, the fats present will turn rancid in time, making it less shelf stable. Though it has a high proportion of protein, not all of that is gluten, and the germ and bran particles tend to interfere with gluten formation, resulting in denser loaves.

  • Specialty flours. Certain flours work best at specific tasks, such as: durum semolina flour is typically used for pasta making; spelt flour, which contains some different gluten proteins than traditional wheat, is an alternative for some people with wheat intolerance; cake flour, which is heavily treated with chlorine dioxide or chlorine gas, has certain unique characteristics beneficial in cake making; some, like Type 55 and Italian 00, are traditional European blends for flavor and specific characteristics.
These don’t include flours made from other grains, such as barley and rye, or even from starchy vegetables, such as the potato. Each of these different flours has its own unique flavors and characteristics in baking, though they are all alike in that they cannot provide the same ability to rise as wheat flours. A great variety of leavened breads use other grains for a portion of the flour to change the texture and to add flavor.

Note that white flours may be bleached or unbleached. Bleaching merely eliminates the natural pale yellow color of wheat flour that disappears with age. It has no beneficial effect on the quality of the flour.

YEAST

Yeasts are unicellular fungi whose metabolism produces several beneficial by-products. In an unsweetened dough, the yeasts feed on the single- and double-unit sugars in the flour, creating carbon dioxide, alcohol, and a range of various enzymes and other chemicals that develop the distinctly yeasty flavor of leavened bread and improve the strength of the gluten network. A small amount of table sugar in the dough will increase yeast activity, but a large amount will decrease it, as will salt. Temperature also greatly affects the yeast metabolism. They’ll be most active at about 95° F, but develop better flavor and texture while growing more slowly at lower temperatures. Most yeast-risen doughs work best at cool room temperatures, usually between 60° F and 70° F, though an extended stay in the refrigerator can produce an especially delicious bread. Similar results can be achieved by using very small amounts of yeast, and allowing the bread to rise for an extended period of time at room temperature.

There are several different types of yeast available for bread baking. Some are preferable for specific tasks, and they are not necessarily interchangeable in all recipes. The most common forms are:
  • Instant yeast. This is the most useful type of yeast for the home baker, and is comprised of dried, dormant yeast cells packed into small rod-like shapes. In this form, they take up water readily, and can be mixed directly with the dry ingredients. It also tends to be more vigorous than other types of dried yeast, and special strains are available for sweet doughs and other yeast-unfriendly environments.

  • Active dry yeast. In the grocery store, this yeast is often found in three-packs of single-use measures. The dry yeast is dormant, but in larger granules than instant yeast, requiring a preliminary soaking in warm water before mixing with other ingredients. Since fewer of the yeast cells in any container are viable, as compared to instant, a larger quantity is needed to achieve the same speed and effect.

  • Cake or compressed yeast. Still moist and alive, this is a block of highly active, and highly perishable, yeast. It requires refrigeration, and must be used quickly, often within a week or two of purchase.

  • Sourdough starter. Unlike the main types of baker’s yeasts, a sourdough starter is a living colony composed of wild yeasts and various strains of bacteria. The effects of the various microorganisms produce a highly flavorful loaf, but slow the bread’s rising and weaken the gluten network. Maintaining a sourdough starter requires regular “feedings” to keep the microorganisms thriving, but it produces breads impossible to replicate with regular yeast.
GLUTEN

Gluten is what gives bread its structure. Essentially long chains of certain wheat proteins, gluten molecules provide the elasticity of bread dough that enables it to capture the carbon dioxide gas created by yeast and expand without falling apart. The chewy crumb of a good European-style loaf is due to gluten, as opposed to the soft, tender texture of a sponge cake. Kneading bread dough helps develop the gluten by stretching and aligning the gluten molecules into a strong network, and the amount of water present will affect how well that network forms. Too little makes for a crumbly texture, while a lot makes for a softer bread. A few ingredients help improve the strength of the gluten network, such as high-protein flour and salt. Others, such as sugar (in large quantities), fats and oils, and acidic ingredients, weaken the gluten to produce softer, more delicate breads.

SHAPES AND OTHER VARIATIONS

Bread can be made into almost any shape imaginable. It can be baked in a pan to control its shape – as can be done for sandwich loaves, or cloverleaf rolls in a muffin pan, or traditional French breads in cloches – or shaped into a relatively free form to cook on a baking stone or a sheet pan. Some breads, such as the traditional Boston brown bread, are traditionally steamed to achieve the proper rise and texture. The size, the shape, and even the desired type of crust on a particular loaf can determine the best way to cook it. As a general rule, smaller breads can cook faster, and at higher temperatures.

Temperature is just one consideration in bread baking. In a standard metal oven, a temperature of 350° F will generally cook a loaf in 45 to 60 minutes, though the crust may remain relatively light-colored. Higher temperatures will enable the bread to cook slightly faster, and brown the crust more thoroughly, but with the risk of scorching the exterior before the interior finishes baking. Many recipes recommend starting breads in a hot oven, around 450° F, for ten to fifteen minutes, then lowering the temperature to finish out the cooking, a process which attempts to reproduce some of the effects of baking in a traditional brick oven. Using a baking stone, or something else with lots of thermal mass, can help moderate the oven temperature and improve bread quality.

Traditional brick ovens, in addition to evenly heating a loaf of bread, also hold in the steam produced as bread bakes. This steam not only assists in transferring heat from the oven to the loaf, but it also provides some extra benefits. During the first six to eight minutes in the oven, a loaf goes through what is called “oven spring,” where the bread rises dramatically; the presence of steam allows the crust to expand without drying out, while also gelating the starch on the surface so that it will brown by the end of baking. Modern ovens do a poor job of keeping steam inside; gas ovens are actively vented to eliminate the steam produced by combustion. Electric ovens do a little better, but it’s an effect worth helping along.

There are a variety of ways to try to keep the oven environment humid. Professional ovens inject steam inside at low pressure to assist in crust formation. Various sources have different recommendations for the home baker. Spraying the hot inner surfaces of the oven with water helps, as can tossing in several ice cubes. A more effective means, if more difficult, is to place a large, ovenproof pan filled with boiling water on the bottom oven rack; if possible, fill it with objects with a lot of surface area, such as rocks or a metal chain, which will help evaporate more water. This produces a reliable source of steam for baking, and can help moderate the oven temperature against the effects of the gas burner or electric element cycling on and off. Still, you should be extremely careful because of the risk of accidentally burning yourself. For one of the simplest and best methods – essentially creating your own little brick oven – see the “No-Knead Bread” recipe.

STORAGE

If you are planning to eat the loaf within a day or two, store it at room temperature in a paper bag or a bread box; this will do the best job of preserving the texture of the crust. Storing bread in a sealed plastic bag will soften the crust and slow the staling process somewhat, but creates a moist enough environment to promote the growth of potentially dangerous molds. For long-term storage, wrap the loaf tightly in plastic or foil and freeze it. Refrigerating bread at temperatures above freezing speeds the staling process by as much as six times.

If a loaf isn’t too old, it can be “refreshed” in the oven and brought back to a state very close to freshly baked. Approximately ten minutes in a 300° F oven reverses some of the effects of staling, making the center of the loaf soft and tender and re-crisping the crust. Popping a slice of bread in the toaster has much the same effect, but with more browning – depending on how you like your toast.

BASIC WHITE BREAD
Makes one 1-½ lb. loaf

INGREDIENTS
  • 3 cups bread or all-purpose flour, plus extra as needed
  • 1 teaspoon instant yeast
  • 1 Tablespoon kosher salt (or 2 teaspoons granulated salt)
  • 1-¼ cups water, body temperature

DIRECTIONS
  1. In a large bowl, mix together the flour, yeast, and salt until well combined. Add the water, stirring, using just enough to bring the dough together into a cohesive mass; if more is needed, add a tablespoon at a time. Turn out onto a lightly floured board and knead by hand until smooth and elastic, about 10 minutes. Transfer to a lightly oiled bowl, cover loosely with plastic wrap or a cloth, and let rise at room temperature until doubled in size, about 1 to 2 hours.

  2. Turn the dough back out onto a lightly floured board and press it out gently with the heel of your hand. Do this to remove any large air bubbles. Return to the bowl, cover, and let rise another hour.

  3. Shape the loaf as desired; if using a loaf pan or other mold, grease it lightly before placing the dough inside. Cover again and allow to rise until almost doubled, 30 minutes to an hour.

  4. Meanwhile, preheat the oven to 450° F. When the dough is ready, slash the top in several places to allow steam to escape, and slide into the oven. Bake for 15 minutes, then lower the temperature to 350° F to finish cooking. When done, tapping the bottom of the loaf should produce a hollow sound; depending on the shape of the loaf, this may take 30 to 45 minutes.

  5. Allow the bread to cool on a rack for at least 30 minutes. If baked in a pan, remove the loaf from the pan once it is out of the oven.

NOTES
  • This recipe can serve as a framework for a great variety of homemade breads. Try experimenting with variations in ingredients, shapes and baking methods to produce a wide range of different breads from essentially the same basic recipe.

NO-KNEAD BREAD
Adapted from the New York Times
Makes one 1-½ lb. loaf

INGREDIENTS
  • 3 cups bread or all-purpose flour, plus extra as needed
  • ¼ teaspoon instant yeast
  • 1 Tablespoon kosher salt (or 2 teaspoons granulated salt)
  • 1-5/8 cups water, room temperature
  • Cornmeal or wheat bran, as needed

DIRECTIONS
  1. In a large bowl, combine the flour, yeast and salt. Add the water, and stir until blended; the dough will be shaggy and sticky. Cover the bowl with plastic wrap. Let the dough rest at least 12 hours, preferably about 18, at warm room temperature, about 70 degrees.

  2. The dough is ready when its surface is dotted with bubbles. Lightly flour a work surface and place the dough on it; sprinkle it with a little more flour and fold it over on itself once or twice. Cover loosely with plastic wrap and let rest about 15 minutes.

  3. Using just enough flour to keep the dough from sticking to work surface or to your fingers, gently and quickly shape it into a ball. Generously coat a cotton towel (not terry cloth) with flour, wheat bran or cornmeal; put the dough seam side down on towel and dust with more flour, bran or cornmeal. Cover with another cotton towel and let rise for about 2 hours. When it’s ready, the dough will be more than double in size and will not readily spring back when poked with a finger.

  4. At least a half-hour before dough is ready, heat oven to 450° F. Put a 6- to 8-quart heavy covered pot (cast iron, enamel, Pyrex or ceramic) in the oven as it heats. When the dough is ready, carefully remove the pot from the oven. Slide your hand under the towel and turn the dough over into the pot, seam side up. Shake the pan once or twice if dough is unevenly distributed; it will straighten out as it bakes. Cover with the lid and bake 30 minutes.

  5. Reduce the oven temperature to 425° F, remove the lid, and bake another 20 to 30 minutes, until the loaf is beautifully browned. Cool on a rack.

NOTES
  • The lengthy proofing period is essential to this bread, for developing the flavor, texture, and full rise.

  • This recipe adapts well to other flours and grains. For example, exchange up to half of the flour with whole wheat flour, a third with cornmeal, or a fifth with rye flour.

ADDITIONAL REFERENCES FOR GENERAL BAKING:
  • Bittman, Mark. How to Cook Everything: Simple Recipes for Great Food. Hoboken, NJ: Wiley, 1998.

  • Bittman, Mark. “The Minimalist: The Secret of Great Bread: Let Time Do the Work.” The New York Times. 8 Nov. 2006.

  • Brown, Alton. I’m Just Here for More Food. New York: Stewart, Tabori and Chang, 2004.

  • Davidson, Alan. The Oxford Companion to Food. 2nd ed. Ed. Tom Jaine. Oxford, UK: Oxford University Press, 2004.

  • Ingram, Christine and Jennie Shapter. The World Encyclopedia of Bread and Bread Making. New York: Hermes House, 2001.

  • McGee, Harold. On Food and Cooking: The Science and Lore of the Kitchen. New York: Scribner, 2004.

  • Rombauer, Irma S., Marion Rombauer Becker, and Ethan Becker. The Joy of Cooking. New York: Scribner, 1997.

06 February 2008

Fasnachts.

Lewisburg.

Doughnuts. For a variety of reasons, they've never really had much of a chance to catch on as regular - or even occasional - homemade treats. Or, more accurately, for one reason: I'm not keen on cleaning up the mess of deep-frying. Sure, they aren't the healthiest food option available, and they don't keep well for very long, but that hasn't stopped me from doing other sorts of cooking.

And, honestly, the cleanup isn't that bad. Not so bad that I can't make an old family tradition once a year. Okay, so my mom didn't make her own yeast-risen dough. But I still have fond memories of those deep-fried, pre-made biscuits, because there's nothing like goodies straight out of the oil. And rolled in sugar. Especially when you're eight.

This was a once-a-year thing, of course, and it was as celebratory as we got for whatever it is that you want to call Fat Tuesday.1 My parents picked up on some of the Fasnacht traditions from when they lived in southern Germany, and I remember receiving a King Cake from my uncle in New Orleans at least one year, but doughnuts - or fasnachts, as my family calls them for this particular occasion - are the peak for me. At least they're easy.

Two weeks ago, or so, I spotted a sign at the local grocery store announcing that they'd have "Fastnacht Donuts" for February 5th. I can't say that the sugary dough puffs nestled in among the awful grocery-store cakes particularly appealed to me, but the idea certainly did. So I called my mom.

She, fortunately, had some time and went looking for the traditional recipe - in her well-worn German cookbook2 - while I hung out on the phone. This is when she pointed out that she used the tubes of Pillsbury biscuits or something like that, but was really excited that I was going to give it a shot the traditional way. It took some time to get the recipe, since we couldn't remember what they were really called. Turns out they're called either Fasnacht kuchen or Bismarcks, or, in their jelly-filled incarnation, Berliners.

Berliners of JFK "I am a jelly doughnut" faux pas fame, of course.

I scrawled the recipe down on a too-small piece of paper, set it aside, and waited. And, for tradition's sake, I made up a small batch last night. They were even better than I remembered, all light and airy, not too sweet, and not at all greasy. So oil-free, actually, that I had to spin them over in the oil just before taking them out so there was enough to make the sugar stick. Suffice to say, we ate them all.

Fasnacht

Fasnacht kuchen
Makes thirty to thirty-six
Adapted from that old German cookbook in my mom's kitchen

Ingredients
  • 3 cups all-purpose flour, plus more as needed
  • ¼ cup sugar
  • 1 cup milk
  • 1/3 cup butter, plus more for greasing bowls
  • 1 teaspoon salt
  • 1 teaspoon instant yeast
  • 3 egg yolks
  • Zest of 1 lemon
  • Vanilla sugar, for dusting
  • Oil, for deep-frying
Directions
  1. Scald the milk in a heavy-bottomed saucepan. While warm, add the sugar, salt and butter, stirring to dissolve and melt. Allow to cool to room temperature, then whisk the egg yolks in thoroughly.

  2. Mix the flour and yeast together in a large bowl, and add the milk mixture, stirring to make a dough. Turn out onto a lightly floured board and knead until smooth and elastic. Form into a ball, place into a buttered bowl, cover, and allow to rise until doubled in size, about two hours.

  3. Turn the dough back out onto the floured board, punch down, and roll out to approximately ½-inch thick. Cut into 3-inch rounds with a biscuit cutter, kneading together and recutting scraps, and allow to rest, covered, for another hour.

  4. Heat a large, deep pot with at least two inches of oil to 365° F. Drop the dough rounds into the hot oil, being sure not to crowd, and cook on each side for about three minutes, or until well-browned. Remove to a rack to drain briefly - until cool enough to touch - before rolling in vanilla sugar. Serve while still warm.
For Berliners, there are two options: a) After frying, poke a hole in the side of each doughnut and use a piping bag and tip to squirt the jelly in; or b) when rolling out, roll the dough to ¼-inch thick. Top rounds with a tablespoon of jelly, then use another to form the top, pinching the edge to make a seal. Personally, I lean to the former option, since any imperfectly sealed, jelly-filled bombs are going to make an awful, hot, splattery mess.

Plus, I like 'em plain. With a little jelly on the side. And a nice cup of coffee.

* * * * *

1I'm interested solely in the food aspect, so "Fat Tuesday" seems to fit best. Though anyone who feels the urge to dress in eye-searingly gaudy colors and dance about in the streets like a lunatic gets a thumbs-up from me.

2I don't even know the actual title. It just gets called the "black German cookbook" because it's the only cookbook with a (faded) black binding and something about German cooking in gold lettering on the spine. Any dust cover disappeared long before my memory of it begins.

03 February 2008

Neon-pink sauerkraut.

Lewisburg.

When Sharon's otherwise occupied for dinner - as is occasionally the case - I like to take the opportunity to eat the sorts of things that won't fly as dinner for two. This often means rummaging through the freezer for a piece of meat that's been waiting for its moment in the spotlight, but tonight it also involved a few other odds and ends sitting around.

Pork chops and pink sauerkraut

Tonight's dinner: seared pork chop with curry, chilli-spiced sweet potato latkes (with applesauce and sour cream), and sauerkraut. It's a bit late for the New Year - pork and sauerkraut being the good luck foods in my family tradition - but better late than never. And not one of the main elements of dinner makes Sharon's list of favorites.

I point it out, however, because of the most visually shocking part: the neon-pink sauerkraut.

Pink sauerkraut

Sadly, I didn't make this myself. It was a gift from a friend who came over to dinner last weekend, and he made so much he happily left the better part of a quart. Despite the freaky coloration, it's absolutely delicious, and about as natural as sauerkraut gets.1 It's fantastic raw, with just that remaining bit of textural bite, or just warmed through.

Matt tells me that the pink color was a surprise to him, too. He put just a single head of red cabbage in the corck with three or four green ones. I can only imagine what an all-red version looks like. Perhaps I'll have to try.

* * * * *

1Cabbage plus salt - brine in this case - with a habanero or two and various spices, like caraway and aniseed. Plus a few weeks of fermentation magic.