19 December 2008

Bread Upon The Brain!

Lewisburg.

I've been on a bread-baking kick of late. The primary reason, I suppose, is that finding decent bread1 around here is nigh impossible. So it's either this:
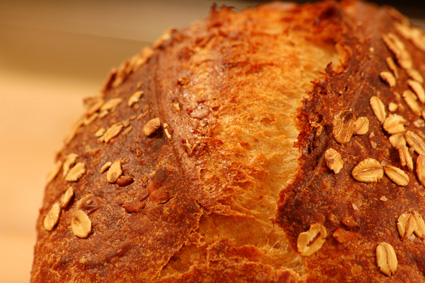
Oatmeal split loaf

Or nothing.

Funny thing about bread: it's very easy to make your own, but it's maddeningly difficult to master. It seems, in fact, that the more time spent attempting to master it, the more I realize the immense complexity and depth of the whole endeavor. Even choosing to restrict the ingredients to the basic four2 - flour, water, yeast, salt - leaves the budding baker with a wide range of options. Personal example: bread was one of the first things I taught myself to make, about ten years ago. I haven't struggled with anything else for near that length of time.3

What I have learned about breadmaking is as follows:
  1. Measuring by volume will drive you mad. Get a good scale and use it for everything. (Exceptions for small quantities, such as fractional teaspoons and tablespoons of yeast, salt, herbs, etc.) Varying the weight of the added liquid - as a percentage of the flour's weight - produces a wide range of results. Try 50% for bagels; 85% for an open texture full of irregular holes; 65-70% for everyday loaves. Corollary: Work in metric; it makes the arithmetic far less headache-inducing. Second corollary: Generally speaking, you'll want to learn the approximate weight of flour that best fits your chosen baking container(s). There's some flexibility here, influenced in part by the specific ingredients you choose, but it helps a) produce well-shaped loaves, and b) reduces the number of times you'll need mentally calculate 65% of 450g.

  2. Novice breadmakers use too much flour. Always.4 You'll almost have to be teetering across the dough/batter divide before kneading becomes impossible. Caveat: Kneading takes longer than you'd think to get the knack for. Fortunately, it's not as critical a step as most cookbooks seem to suggest.

  3. Bake at higher temperatures. 350°F may be essential for especially rich or sweet breads - brioche, cinnamon rolls - to prevent scorching, but it makes for an unimpressive crust on most loaves. I'm currently baking most breads in the 425° - 450°F range, though pizza crusts get as much fire5 as the oven'll give me.

  4. Don't use sugar. Unless you want the sweetness (sweet breads) or flavor (bagels and pretzels), of course. There's plenty of food for the yeast in the flour, and giving them refined sugars only reduces the fermented flavors in the finished bread. Some people seem surprised by this, which itself surprises me. After all, refined sugar's pretty new on the culinary scene; leavened bread's leaning to the ancient side.

  5. Less yeast, more time. Makes it taste better. Plus, the timing's more forgiving. The refrigerator can be a fine tool.

  6. Use enough salt. It improves both flavor and texture. I use a scant tablespoon - 15g or so - of kosher salt for 450g of flour, which suits me.

  7. For a lovely, shattery crust, an enclosable baking container works wonders. A cast-iron dutch oven (preheated, of course) is the best I've found, though I bake sandwich loaves with a pair of loaf pans. One sits upside-down atop the other, held in place with binder clips. A tent of aluminum foil, tightly crimped around the edges, works well, but you need to be careful to leave enough space for the oven spring.

  8. Make bread frequently. I don't often repeat the same precise recipe, but each time is a variation on a few different themes, and the experimentation makes for a fine teacher.

  9. Finally: those who don't bake bread are inevitably impressed with all but the most spectacular failures. (That would be the great majority of everyone you know.)
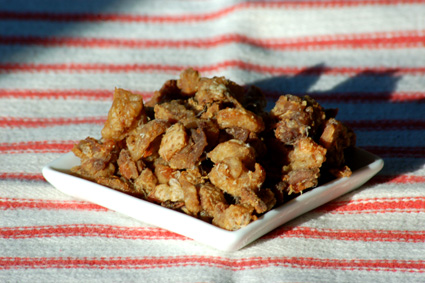
There's probably something I've neglected to mention, and even more that I'll continue to learn through trial and (edible) error. But until then:
Walnut bread
This loaf's becoming a favorite treat around here, fueling the need to buy walnuts in bulk. (The squirrels get every single nut off of the trees in the backyard.) It makes a fine loaf bread, though I made a wreath-like epi version for a holiday gift. Rich and tender, it's lovely stuff.

The following quantities suit my 9-¼" x 5-¼" loaf pan, which is how I'm most inclined to make it. To grind the walnuts, I give them a quick trip through the food processor. The result is fairly fine without becoming oily.

Ingredients:
  • 600g bread flour
  • 100g ground walnuts
  • 20g salt
  • 3/8 teaspoon yeast
  • 420g water
Directions:
  1. Mix together the dry ingredients in a large bowl. Stir in the water, and turn out onto a lightly floured board. Knead briefly, until it is all incorporated together. A shaggy dough is just fine. Shape into a ball and return to the bowl. Cover with plastic wrap and allow to rest 18-24 hours.

  2. Punch down the dough and shape into a loaf; allow to proof, covered, in a lightly greased loaf pan for at least an hour. Bake in a 425°F oven for about an hour; if possible, keep the loaf tightly covered for the first half hour. Allow to cool on a rack.
* * * * *

1As in "good enough", not "especially good" or "great".

2Which I'm certainly not doing.

3Even something like roasting a Thanksgiving turkey, that once-a-year-and-only-once process, is coming along at a better clip.

4Note: This will not happen if you adhere to two simple rules.
  1. Weigh your ingredients. Do not use volume measures.

  2. Use a minimum of flour on your board when kneading. Using a dough scraper helps, particularly for doughs with 70% hydration and up.
Also: Kneading the dough will help even out wet/dry patches, as will rising time.

5550°F. Getting the right crust at that temperature, about two hundred degrees below a professional oven, is really tough. Really tough. I'm not quite ready to build a wood-fired brick oven, but it's really tempting to hunt for the right excuse.

04 November 2008

28 October 2008

Halloween horror.

Lewisburg.

We're expecting trick-or-treating munchkins this year, which poses a few problems that we hadn't thought out particularly well before. After all, when you've lived for years inside a locked apartment building with few, if any, small children, these things don't become issues at the forefront of your mind. Halloween focuses more on cobbling together a costume from the nearest thrift store, then stopping to pick up some beer on the way to the party.1 Last year, Sharon picked up some candy at CVS, sort of last-minute, to give out to the handful of kids who stopped by, but that was as far as we got.

(Apparently - even though I missed it - the 3- or 4-year-old in a lion costume who stopped by was the event of the evening. He didn't remember to say "trick or treat" and wasn't sure what to do after receiving his candy. So he just sat down on the porch, looking up at Sharon, until his mother coaxed him down. Our neighbors thought he was adorably hilarious, too.)

This year, we've expanded a bit. Sharon went to the little candy shop downtown to pick up some treats that aren't HFCS-based. Sure, they're still loaded with sugar - they look like un-crooked candy canes to me, so they've got to be 98% sugar, minimum - but at least it's supporting a local business. And we brought home a pumpkin from the market for the first jack o'lantern either of us has made for years. It was tough, actually, trying to figure out what to carve, when we hadn't done this for so long. So, after a lot of scribbling on little pieces of paper:

Jack o lantern 1

Unilluminated, it's not the most exciting of pumpkins. Having hacked away with the paring knife, though, it isn't as though I could go back and erase, so we dropped in a candle, dimmed the lights, and were pleasantly surprised. Seriously. I neglected to take a candle-less photo, but you'll have to trust me that it was about as unimpressive as it could be.

Even better, though, is when we turned out all of the kitchen lights:

Jack o lantern 2

Good enough for government work, as my dad might say. Which, of course, reminds me that the scariest day of the coming week isn't Friday. It's Tuesday.2

I recommend a regular dose of FiveThirtyEight to take the edge off. Polls, of course, are inherently limited, but aside from knowing my polling place - and a little volunteer time for the GOTV effort - there's little I can effectively do. It's frightening to see the massive, clanging, somewhat-irrational-and-unpredictable behemoth that is the presidential election screeching and howling into election day.

Maybe I should dress up as the electoral college.

* * * * *

1There aren't as many parties to attend, now that we're in central PA, playing the "responsible adult" game, so costumes aren't happening for 2008.a But Fiend Without A Face should be arriving before Friday, so at least we have something horror-related to watch. That's safe to have on when a 4-year-old comes to the door.

My initial thoughts were to watch something more like Dead Ringers or The Act of Seeing with One’s Own Eyes, but neither of those is remotely appropriate for a television that can be seen from the porch.

aBesides that, what am I going to dress up as? The current Republican ticket's the scariest thing I can think of. Aside from some sort of terrible, world destroying Cheney-zilla. (Maybe next year.)

2Why Tuesday? Indeed.

25 September 2008

The Mighty Olive!

Lewisburg.

There are all manner of foods that, upon reflection, seem unlikely or even impossible candidates to make that leap from "thing out there in nature" to "tasty and delicious comestible".1 Cassava - also known as manioc and yuca, and which provides us with tapioca - comes to mind, since it's chock full of delightful prussic acid, or hydrogen cyanide, and requires a combination soaking and heating processes to make it safe to eat. Or the cow, which in its ancient form, the aurochs2, seems a little less dangerous to hunt than a rhinocerous, and only marginally more domesticable.

Or the olive. The humble olive, fruit of Olea europaea:

Fresh olives

Oval-shaped, speckled green, and definitely on the so-bitter-this-isn't-food side of the fence. Karl, my olive-curing partner, and I each tasted just a little bit of fresh, unripe olive, which left a lingering bitterness at the back of the mouth for at least five or ten minutes. A whole green olive, I've heard, can have enough oleuropein to keep you stocked in mouth-tingling bitterness for several hours. Even after the bitterness went, the tingling sensation lingered at the back of the roof of the mouth, the very same cough-inducing tingle that you get from good, fresh olive oil.

Incidentally, that little bite of olive tasted a lot like raw dandelion greens, or any other wild, bitter green. Not bad, per se, but definitely something to be had in moderation, and not by itself. And not as fiercely bitter as the Tylopilus felleus mushrooms I found back in July, which all but screamed not to be eaten.3 The bitterness didn't come on at first, but swelled and then faded. Neither of us felt the need to go back for seconds.

Bitterness, in olives and pretty much all other plants, is a way of communicating the message not to eat. It's less common in fruit than in leaves, for example, because an appealingly tasty fruit is more likely to find a hungry animal to help disperse the seeds. For olives, however, bitter fruit works. Their preferred seed dispersers are birds, which swallow the olives whole; we mammals chew before swallowing, which can damage the seed, especially in a fruit with just one large, central seed.

Olea europaea seems to have a rather good story of evolutionary success, due in no small part to humans. Oleasters, the wild trees, supplied occasional food for neolithic hunter-gatherers 10,000 years ago; Alan Davidson describes fully ripe olives as "relatively free of bitterness", which I suppose was good enough. Evidence of olive mills and presses, as well as cultivation, dates back to before 3,000 BCE. It's quite likely that these oily little fruit - up to 30% of the flesh - were originally used for just their oil, for cooking and for lamp fuel. Even today, 90% of the world's crop is destined for olive oil.4

So they're useful trees. Long-lived, too. Harold McGee notes that they're hardy, drought-tolerant, and can live and bear for a thousand years. Though severe cold will kill them - severe frosts in Provence in 1870 and 1956 did massive damage - they can survive in Mediterranean-like climates wherever they're found. I used to sit and read under them in central Arizona, and can say that they're quite possibly the loveliest, most graceful trees I've ever seen.

In addition to being useful, they've also done serious ecological damage, following overplanting - some government-forced in the ancient Mediterranean - which put olives everywhere they'd grow. To the exclusion of plenty of other plants and animals, of course.

Back to the matter at hand. Olives can be harvested anywhere from green - unripe, hard, and bitter - to purplish-black - ripe, soft, and still bitter, but not so much. To alleviate the bitterness, there are several methods that may be used alone or in combination:
  • Water-curing, which requires repeated soakings and rinsings to leach out the bitter oleuropein. Repeated, as in over several months.

  • Brine-curing, which is a fermentation process in salt brine that can take from one to six months to complete.

  • Dry-curing, which involves packing the olives in salt to cure, much like making preserved lemons, I suppose.

  • Oil-curing, which can mean soaking in oil (presumably olive) for several months, or can mean dry-curing olives, followed by a rubbing with oil.

  • Lye-curing, which uses a highly alkaline solution to extract the oleuropein.
We went with the brine option, in no small part because that's what I'd read about in a New York Times article last year. Perhaps I'll try dry-curing in salt someday, but brine seems the best and easiest.

Unlike lye-curing. The Romans would sometimes add wood ash to their olive brine to speed the process, though today's processors use straight-up lye. Ask your extension agent (if you live on California olive country) about home curing, and that's the method they'll give you. I don't know about you, but high-octane drain cleaner doesn't strike me as the best thing for food preparation. After all, the warning information includes fun little tips, like:
  • "Avoid all contact with organic tissue (including human skin, eyes, mouth, and animals or pets). Keep away from clothing. Avoid all contact with aluminum."

  • "...may cause chemical burns, permanent injury or scarring, and blindness."

  • "...may react with various sugars to generate carbon monoxide..."
And my personal favorite:
  • "Solvation of sodium hydroxide and/or potassium hydroxide is highly exothermic, and the resulting heat may cause heat burns or ignite flammables."
In other words: put this stuff in water, and you risk burning yourself and your possessions. Plus, it comes with a handy-dandy corrosive warning label that shows an image of freaky chemicals eating through flesh, just like the creature's blood in Alien eating through the spaceship floor. Though that's not entirely accurate, of course. It'd be more like the scene in Fight Club where "Jack" gets a chemical burn.

Karl and I, not eager to disfigure ourselves for the sake of a martini garnish, have elected to go with the brine option. In short, it went like this: fill glass jars of various sizes with olives and flavorings; add a bit of vinegar (optional); cover in a brine strong enough to float an egg; put a layer of oil to cover; seal (but not too tightly); wait. Six months, we think, which conveniently runs from equinox to equinox. The last step, of course, is to eat them, preferably at a party with lots of olives and martinis to go around.

I should mention that we've branched out in terms of flavorings, and Karl more so than me, in part because he used a number of much smaller jars.5 We used citrus - lemons, limes, oranges - as well as hot peppers of various sorts, garlic, celery, herbs, ginger, and two pantries' worth of spices. I remember using bay leaves, black pepper, coriander, mustard seed, cinnamon, and possibly others. Sumac, allspice, cardamom, star anise, and cloves were others that might be flavoring one or more jars, because I remember discussing them. All options were open, and we'll see how they pan out. Fortunately, we had the good sense to label everything for our future benefit.

Olives

Will it work out? I have no idea. The jars are busy fermenting - actually bubbling away - down in the fermentarium, so I'm excited. And in six months' time, if the fickle and mighty fermentarium spirits smile down6 upon us, there will be much rejoicing. And martini consumption.

* * * * *

1Not even counting things - usually animals - that are especially poisonous or otherwise deadly, like fugu, the pufferfish, where extensive training is needed to separate the edible flesh (for sushi) from the highly toxic liver. Or poisonous snakes, such as rattlesnake and cobra, which hardly seem worth the effort.

2Though I wish we called it the "Ur-Ox", since that may be where "aurochs" comes from. A much more impressive name for a giant - supposedly almost six feet at the shoulder - and aggressive beast that gave Julius Caesar and his Roman legions pause.

3I didn't eat them, of course. Just the briefest touch of the tongue was worse than a bite of olive, and immediately. Yarf.

4Table olives and oil olives come from different varieties, though I imagine you could interchange them if you wanted to. The result might not be as ideal, but if you find yourself in sudden possession of an olive grove, you might as well put it to good use.

5He had a dozen 12 oz. or pint jars, and borrowed a few quarts from me. I have a total of four quarts; two half-gallons; and one gallon jar, all packed full.

6Or is it up? They live in the basement, after all, so the highest they could be isn't much above eye level.

18 September 2008

Playing catch-up.

Lewisburg.

It's been quite some time since I've posted much of anything here, though it's not for lack of interesting doin's a-transpirin'. So, I'll just cram the last month's worthwhile mentions in here all at once.

The Mighty Mighty Garden
I haven't mentioned much about the garden all summer, though it's been an overall success. There were occasional failures - the kale and leeks didn't get enough water early on; raccoons got most of the sweet corn; the Romanesco stubbornly refuses to create a head - but much of it has exceeded expectations. We had dinner for eight last weekend in a desperate attempt to use up the vast amounts of Lao eggplant and other vegetables in a fiery green Thai curry, with lots of sliced multicolored tomatoes for a mouth-cooling side dish.

It's been, as I tell myself every so often, a learning year. I'm already ankle-deep in planning for next year, with garlic arriving for planting next week. The spinach and mache should be planted for overwintering soon, too, so we'll see how they take. There's been so much food already that we'll have a thoroughly stocked basement to last us through the winter. Nuclear or not.

I was amused to note an article from the LA Times on too many tomatoes. Not a problem I'd ever expected to have, though we're toeing the line this year.

Oh, and pears, both Asian and European. More than I can even know what to do with, or even give away. Next year, I'll have to put a plan in place.

Fermentacular!
Speaking of garden bounty, I've had pretty good success with my first-ever attempt at cabbage. There's been a bit of a cabbage looper infestation in the brassicas, though the plants seem to be getting along well enough. Next year I'm planning to keep some organic Bt handy to quell the caterpillar munchies, though it seems like healthy plants can soldier on despite the pests.

I like cabbage and all, but even half a dozen smallish heads is a lot to use. And a lot of fridge space to give up. So today I've started up a first batch of sauerkraut, which will (in theory) ferment away in the basement for two weeks or so until it's sour, salty, and delicious.

Come Sunday, the cabbage will be joined by several jars of fresh olives, curing in several different types of brine. Two boxes of green Manzanillas are sitting on the dining room table at this moment, awaiting their six-month briny bath. Then, if I get off my duff and hop to it, I'll add some miso to the mix. My Japanese koji starters are here, too, with the cultures I need to make my own shoyu - a gallon at a time - as well as white, yellow, and red misos. Mmm. Moldy rice.

Speaking of tasty, tasty fungus...
Last I'd mentioned wild mushrooms, I still hadn't found much interesting, at least in the culinary sense. Well, that's all changed. After a long, dry period, the long arms of tropical storm Hanna drenched us, followed by waves of thunderstorms that gave all of the local fungi the cue to burst forth.

After an unimpressive hike through Bald Eagle State Forest, which didn't appear to get the Hanna-related deluge we did, I was able to find several meals' worth of mushrooms in the neighborhood and around town.2 Agaricus campestris, the field mushroom; Lepiota americana, the American lepiota; and Calvatia cyathiformis, the vase-shaped puffball. Plus the probably-edible Lepiota naucinoides that looks almost exactly like the freakishly deadly Amanita virosa. Edible? Probably. Coming into the house? Not a chance.

All three of the edible ones are quite tasty, and different from each other. The field mushrooms are like a more flavorful version of the white button mushrooms you see in the supermarket, though less fleshy and best cooked as a whole cap (or halves) than in slices. The American lepiota is a bit deeper and richer in flavor, though still similar. The puffball, however, has a very mild flavor, and a soft, squishy texture that's almost marshmallow-like. I'd sliced it up into quarter-inch thick pieces, and fried it until browned and crispy at the edges in some butter, and they were quite good.

And speaking of fermented deliciousness...
Sometimes it's just easier to go with things that someone else has conveniently fermented (and distilled) ahead of time. Thus I have a new bottle of homemade bitters, made from apricot kernels and orange peel. I followed the same basic recipe as before, but skipped the spices. At first, it smelled only of orange, and I was getting disappointed until the amaretto-like aroma of the apricot kernels took over. Sure, they're toxic - though that doesn't keep them from sale in health food stores3 as a "dietary supplement" or even a snack food. Extracted into alcohol, and consumed as just a few drops from time to time in a cocktail, it seems, shouldn't mess me up too much.

Apricot kernels are also - so I hear - an occasional ingredient in ratafia, though I've been making mine with fruits and vegetables. Steep a cup of fruits, vegetables, herbs, or a mix in a bottle of wine, with a quarter cup each of vodka and sugar, for three weeks. Strain out the solids, bottle it up, and drink it up. Utterly delicious, and a great after-dinner drink. The first batches - apricot, plum, and peach with Thai basil - are almost gone, just in time for the next set of Green Zebra tomatoes with black peppercorns and cucumber with mint. In a few days, I'm planning to pick the first of the season's habanero peppers for an incendiary third round.

And for the extra-boozy option, there's the walnut brandy that's been steeping since early July. There was one part of the recipe that reminded me of Kim Severson's New York Times article on recipe deal breakers, which was when a line began, "At the beginning of September..."

Hasn't been a deal breaker for me, but then again, I wouldn't have gotten that far if I didn't have a pair of walnut trees in the backyard. Trees that have been feeding the squirrels instead of me, that is.

Back to school?
It's cooking class time again. This semester, it's vegetarian cooking basics. The first class, which covered knife skills while the students made hand-rolled sushi and Vietnamese summer rolls, offered up a reminder: the second class must cover recipe reading.

Sound silly? Most people seem to think so at first, but after multiple exchanges that go something like this...
Student: What do I do next?

Me: What does the recipe tell you to do?

Student: Umm... [looks down at recipe for what must be the first time] I put the rice and water in the pot?

Me: If that's what it says.
...you learn not to take basic literacy skills for granted. Misreading in one thing. I can accept mistakes.4 But relying on me to read the recipe to them won't cut it.

They're adults. I think they can manage to think for themselves for once. It might even be a good thing to learn.

* * * * *

1Yet another dehydrator full of tomatoes is whirring away behind me, to add to the four quarts of dried tomatoes already done. Plus the jars of canned tomatoes, pickled cucumbers, beets, peppers, jams, and more. And the onions, potatoes, carrots, etc.

2I should note that I've been checking these mushrooms' characteristics and spore prints carefully against the several mushroom guidebooks that I own to be certain they're safe for eating. And even when I'm sure they're edible, I make sure to eat only very small portions the first time to see if I have an allergic reaction. Hasn't happened yet, but I don't want to find out after a plateful of mushroom ragout.

3They're called bitter almonds, too, because of the bitterness caused by small amounts of amygdalin, which the body converts into toxic cyanide. Eat enough of 'em, and you can kill yourself. Though since I could almost see and hear the smell of almonds after eating just one, I can't imagine how one would do that. Ugh.

4It isn't as though I don't make enough on my own. Without mistakes, I wouldn't know how to cook.

18 August 2008

How to make a mushroom spore print.

Lewisburg.

To make a mushroom spore print:
  1. Find a mushroom. (Obviously.) Fresh, not too young or old, and ideally with a handful of others like it that you can take home, too. If you get especially lucky, and happen upon a group with some as little buttons1 and others as mature mushrooms, take a variety.

    Do be a responsible mushroomer and leave a few to propagate their species. If they're edible, and you eat them all, you won't have the same pleasure next year.

    Mushroom and paper

  2. Get some white and black paper. Spores can be all sorts of colors, from white to black and a maddening array of subtly different shades in between. With two different backgrounds, it's easier2 to make distinctions.

  3. Place the spore-producing surface above the paper, half on white and half on black. If you can, leave a bit of stalk to elevate the cap above the paper, though it's not necessary. Cover the mushroom with a bowl, wax paper, or some such to keep it from drying out. A dry mushroom won't drop spores.

    Making spore print

  4. Wait. Several hours is good; overnight is ideal.

  5. If you can, try to peer under the cap3 to see if a print has formed on the paper. You can lift the cap, too, though doing so before it's finished can result in a smudged print. It's still fine for identification, but doesn't look as sharp.

  6. When it's ready, take the print to a place where you can view it in sunlight. Artificial light sources, such as incandescent and fluorescent, just can't provide the same full-spectral distribution you need to make a crucial distinction.4

    Spore print

  7. Use that spore print - and other observations - to figure out just what it is that you brought home. And, if you like the print, you can hit it with a bit of artist's fixative and keep it. A good print looks sharp, indeed.
To identify, find yourself a good guide. Or better yet, several. My primary guide is Mushrooms of Northeastern North America by Bessette, et al. It's big, thorough, and has lots of pretty pictures.

To identify your mushroom:
  1. Determine which category you should start in. In this book, your options are:
    • Split Gill Family
    • Chanterelles and Allies
    • Gilled Mushrooms
    • Boletes
    • Polypores
    • Tooth Fungi
    • Cauliflower Mushrooms
    • Branched and Clustered Corals
    • Fiber Fans and Vases
    • Jelly Fungi
    • Crust and Parchment Fungi and Allies
    • Puffballs, Earthballs, Earthstars, and Allies
    • Stinkhorns
    • Bird's-Nest Fungi
    • Blueberry Galls and Azalea Apples
    • Rusts and Smuts
    • Morels, False Morels, and Allies
    • Cup and Saucer Fungi
    • Earth Tongues, Earth Clubs, and Allies
    • Cordyceps, Claviceps, and Allies
    • Carbon and Cushion Fungi
    • Hypomyces and Allies

    Got it? In this case, we've got gills. 90% of the time - probably more - you're here or in Bolete territory. Especially if you're picking things that look like mushrooms.

  2. Work through the key as best you can. It helps to check the glossary for unfamiliar terms, such as: decurrent, amyloid, lamellulae, etc. It's sort of like a Choose-Your-Own-Adventure, where you read through the options, pick the one that suits best, and jump to that number.

    "1. Stalk central to eccentric → 2.
    1. Stalk absent to lateral → 26."

    Off we go to number 2.

  3. "2. Gills attached to decurrent; gills, cap flesh, or stalk exuding latex when cut..."

    Nope. Not a Lactarius.

    "2. As above, except latex absent; gills white to pale orange; lamellulae few or absent in many species; stalk lacking vertical fibers, snapping somewhat like a piece of chalk..."

    Nope. Not near that brittle a stalk.

    "2. Not as in either of the above choices, but spore print white to cream → 3.
    2. Spore print pink, tan, yellow, or darker → 4."

    Down to number 3.

  4. "3. Universal veil slimy to glutinous..."

    No universal veil.

    "3. Universal veil present..."

    Same deal. I'd spotted these in various stages of development, and there's no evidence of one. If it's been raining, especially, there's a chance that a universal veil could have been washed away.

    "3. Entire mushroom usually very moist..."

    Nope. It's a rather dry mushroom, with a texture like the supermarket button variety.

    "3. Cap coated with loose granules..."

    Nope.

    "3. Cap white, tan, brownish, or reddish, usually distinctly scaly in age; gills free, white, close; partial veil present, usually leaving a ring on stalk; terrestrial, usually growing on dead plant debris (e.g., leaves, needles, wood chips); spores smooth, dextrinoid, amyloid, or inamyloid → Genus Lepiota and Allies."

    That's our sample. But for the microscopic characteristics, everything matches. Which is great, because the next choice in the list includes the phrase "other characters exceedingly variable", which doesn't inspire too much confidence.

  5. Skipping ahead to the Lepiota section, there's another Choose-Your-Own-Adventure, starting out with long, precise descriptions. Passing those that don't match leads to two choices: Lepiota naucinoides, edible, and Lepiota cepaestipes, poisonous. Turns out it's the latter, though both could be confused for a deadly Amanita species by a casual observer.
* * * * *

1Or whatever the immature shape happens to be.

2But not always easy. Get used to the differences between cinnamon brown, rusty brown, and ochraceous, for starters.

3Keeping the cap elevated just slightly makes this much, much easier.

4I suggest trying to distinguish between similar shades of brown under incandescent light first, then under daylight. The perceptual difference is striking.

28 July 2008

Garden bounty.

Lewisburg.

The best of the garden's pleasures, of course, comes at this sort of moment:

Garden harvest 080727

That moment when you get inside with everything ripe, and think that, just a few months ago, all you had were a handful of little seeds. Especially, as in our case, when you've got something in your hand that you've never had successfully before. In this case, it's everything on the plate.

Technically, at least, because this is the first year I've had success growing my own seedlings. Sure, I've grown cucumbers from seed, though they didn't get far before the cucumber beetles destroyed them. And I suppose that summer squash aren't surprising, but the eggplant's thrilling. Even when we'd tried from purchased seedlings, the plants never looked half as good as the ones in the garden now. And those fruits that did start to grow were all ruined by something that took a single bite from each eggplant. Never ate more than that, which was rather frustrating. Presumably, if it didn't like the first one, the rest of them weren't going to taste any better.

On the plate, in case you're wondering, are: Listada de Gandia eggplant (the white and purple streaked ones); Lao Green Stripe eggplant (the white and green one); a cucumber (Parisian Pickling - the smaller ones are for cornichons); a zucchini (Black Beauty); a patty pan squash (Sunburst); and jalapeno and serrano peppers. We've been pulling more from the garden, too, including new potatoes, Dragon's Tongue snap beans, and scallions. Not to mention the greens, radishes, turnips, and other cold-weather crops from the spring. It's a lot of work - I've already spent several hours of my day weeding - but it feels worth it. Maybe it's just me, but is there anything quite like picking your dinner ripe from the backyard?

In a few minutes, I'm going out to see if the first Sun Gold tomatoes are ripe yet. They've been taunting us for days.

23 July 2008

Orange bitters.

Lewisburg.

I love a good martini:

Martini

As I make 'em, the recipe goes something like this:
Martini

Ingredients:
  • 3 parts good gin (such as Hendrick's)
  • 1 part dry vermouth1
  • Dash orange bitters
  • Olives
  • Ice
Directions:
  1. Add three or four ice cubes to a shaker, then pour in the gin and vermouth. Add a drop or two of orange bitters, to taste. Cover and swirl about for a moment, or shake if you're really feeling it.

  2. Strain into a glass, and garnish with a toothpick loaded with olives. Like, say, three. Taste and add another drop of bitters if it needs a sharper edge.
Pretty straightforward, as long as you can find orange bitters. Which, living in Pennsylvania, is something I can't do easily. Next best thing? Make my own, of course.

To be honest, I have no idea if this is what orange bitters are supposed to be like, though I rather like them. Enough that I add a drop here and there to give a cocktail a nice edge. In a margarita, for example, it adds an extra dimension to the sweet and salty character, and the orange aroma fits in nicely. Ain't so bad in a Manhattan, either, though the traditional angostura bitters suit best.

A little Google work turned up one orange bitters recipe in a handful of places. It goes like this:
Orange bitters

Ingredients:
  • ½ lb. dried bitter seville orange peel
  • 1 pinch cardamom
  • 1 pinch caraway
  • 1 pinch coriander seeds
  • 2 cups grain alcohol
  • Water
  • 4 tablespoons caramel food coloring
Directions:
  1. Chop the orange peel finely and mix it with the herbs and alcohol. Let it stand for 15-20 days in a sealed jar, agitating it every day.

  2. Pour off spirits through a cloth and seal again.

  3. Put the strained off seeds and peel in a saucepan, crush it, cover with boiling water and simmer for 5 minutes. Pour into another jar, cover, and let stand for 2 days. Strain this off and add it to the spirits. Add caramel coloring, filter again and let it rest until it settles perfectly clear. Target: 45% alc.
Sounds easy enough, except for a few minor details:
  1. I can't get grain alcohol in Pennsylvania, and the drive to New Jersey, or whatever other state might have it readily available, is awfully hard to justify.

  2. Dried bitter orange peel isn't cheap. At about $2.50 per ounce, it's better to pick up a pound ($12) at a homebrew shop.

  3. Food coloring? Seriously? (Some versions of the recipe call for burnt sugar, i.e., caramel.) I don't like the way the angostura bitters pinken up a martini, and it seems like a concession to aesthetics.
So I swapped those out for Bacardi 151 and some fresh sour orange peel - why not? - from the grocery store. And skipped the caramel. At least this way, should it turn out nasty, I'm only out a few bucks. Fortunately, it worked out perfectly:

Orange bitters

My modified recipe, for an aromatic, boldly orange-colored orange bitters is as follows:
Orange bitters

Ingredients:
  • Rind of three sour oranges, finely diced
  • 1 pinch cardamom
  • 1 pinch caraway
  • 1 pinch coriander seeds
  • 1 cup Bacardi 151 rum
  • ¾ cup water
Directions:
  1. Pack the diced orange peel - with the white pith - into a pint glass jar with the spices. Pour in the rum to cover, seal the jar, and set aside for at least two weeks, shaking at least once a day. Smell and taste every few days to see how it's progessing; the aroma and bitterness really build.

  2. Strain off through a fine sieve, then through a coffee filter, saving the peel and spices. In a pot, crush the peel and spices, cover with the boiling water, and simmer for five minutes. Strain this liquid through the sieve and another coffee filter, and add ½ cup to the spirits. Seal tightly.

  3. Allow the cloudiness to settle. This will seem to take forever; this batch sat for about a month until the cloudiness had sunk to the bottom. Strain through a coffee filter, bottle, and enjoy.
* * * * *

1Or, for a sweet martini, swap out the dry vermouth for sweet, and the olives for a twist of orange peel.

Alpine strawberries.

Lewisburg.

Strawberries are genuinely awesome. And, for those who don't have the space for a bed of Sparkle or Honeoye or whatever, may I wholeheartedly recommend the Alexandria alpine strawberries?

Alpine strawberries

Man, are they ever good. Small, about the size of the last joint on my pinky finger, and the plants don't produce tons and tons, but they are powerfully aromatic and delicious. They're almost like strawberry candy, with a sort of concord grape foxiness. Best of all, they do really well in pots. Find a relatively sunny spot, keep 'em well watered, and you've got tabletop strawberries for years to come. All for the price of a pack of seeds.

06 July 2008

The mighty mushroom haul.

Lewisburg.

I enjoy walking in the woods; it's generally relaxing, often great exercise, and increasing levels of engagement reward with more and more interesting things to see. There's just too much out there to take it all in.

Saturday, I went on a day hike with my dad and Ben, my sister's boyfriend, in the nearby State Forest lands. Ben hadn't really been on a hike since he was a kid, and my dad's been anxious to get out and get some exercise, though other obligations usually get in the way. So we picked a spot, parked the car, and just headed off. There was plenty to see, including vast fields of wild blueberries1 ripening and ready for nibbling. Not much in the way of views, unfortunately, but I was busy staring at the ground for hours. This is, I discovered, a prime time for mushroom hunting.

Behold the haul:

Mighty mushroom haul

I wasn't expecting to find much, but I did toss a few paper bags in my pack, just in case. Then, to my surprise, there was so much to find that I came home with my pack2 completely full of mushrooms. Everything there on the table plus a monstrous bolete that ended up a bit too smashed for identification. With a cap about eight inches across and four inches high - plus stem - it was enormous. If I could have identified it, and it turned out to be edible, it would have been a meal for everyone.

Mushroom identification is, generally speaking, difficult. A few species are easy and straightforward; others are actually impossible. Of the thousands of different fungi growing in the central Pennsylvania woods, some sizable fraction is unidentifiable by anyone. Another chunk requires chemical tests and powerful microscopes to be certain. And often, even when you can figure out what it is - scientific name and all - there's no one who can say whether it's edible or not3. That doesn't mean it isn't fun to try, though.

When I arrived home, I spread them all out on paper, both black and white, and did my best to keep the same types together. With some, I only had one or two of the fruiting bodies. Of one type, I had eight. And some had made the trip back in better shape than others.

Spore print

There were, of course, numerous types of mushrooms that didn't make the trip home with me. One rather prevalent was the tough-to-miss fly mushroom, Amanita muscaria. Orange and yellow, flecked with white, and alarmingly toxic. Even more alarming was what might have been Amanita verna or one of its close relatives, which get charming common names like "Destroying Angel". Sure, I brought a few home that turned out to be inedible, and at least one that's definitely poisonous. Next time, I can skip over those.

The reason for the two papers is to get what's called a spore print. Leave the spore-producing surface - gills, pores, etc. - still for a while, and the spores will fall onto the paper. Some are light-colored; some are dark; it's rarely apparent what to expect. With both black and white, you can be sure to get a good reading.

Spore print 2

With that information in hand, and a selection of reference guides, it's time to examine characteristics. I'm limited in that regard, since I can't pretend to afford a microscope that can distinguish between amyloid and non-amyloid spore shapes, and I don't keep potassium hydroxide and other handy mycological solutions around. Generally, if identification needs that sort of thing, I'm not going to try to eat it. Even with a number of positively identified mushrooms in my bag, I opted not to eat any. Though I might the next time out4, since I know better what to look for.

I couldn't identify everything. In some cases, all I have is a possible genus. Sometimes not even that. There was only one that I knew for sure when I picked it up. For those who're curious, the mushrooms I found, more or less counterclockwise from upper left, are:
  • Craterellus fallax, the black trumpet. The only mushrooms I knew without even pausing to think, I'd've eaten them if they weren't infected with a white mold. Even though they're just a bite.

  • Possibly Lentaria byssiseda, but all I really know is that it's some sort of coral fungus. Most likely inedible.

  • Another guess for Mycena strobilinoides, though the genus seems likely. Not the sort of thing I'd want to put in my mouth, but it was definitely an attention-grabber, and gave one of the best spore prints.

  • Something in the Lactarius genus, so called because it exudes a milky fluid when cut. Some are edible; some aren't; this doesn't appear to be.

  • I don't know. Crepidotus something, maybe, but even that's a shot in the dark. Not food.

  • A small member of Boletellus, Boletus, or Chalciporus, I think, but nothing seemed to fit beyond that. Since it didn't give a good spore print, I can't be any more confident than that.

  • No real idea. Possibly something in the Leccinum genus. Or not.

  • Boletus affinis, which means it's actually edible. Not the most exciting mushroom around, from what the guides tell me, but it was exciting to get a positive identification for once.

  • The Chanterelle Waxy Cap, Hygrophorus cantharellus, which I'd expected might be poisonous out in the woods. Bright reddish-orange doesn't always suggest safe to me, but apparently these are.

  • Not sure again, though Cortinarius seems likely. Which means it's best left on the forest floor next time.

  • The Jack O' Lantern mushroom, Omphalina olearius, I think, unless it's the other poisonous false chanterelle. If I'd had an inkling earlier, I could have peeked at it late last night. Like fireflies, these mushrooms produce luciferin and luciferase, which makes them glow pale green when it's pitch black.

  • No clue. None whatsoever.

  • Boletus affinis var. maculosus, which is almost the same as another one of the edibles I brought home. Aside from the yellow-brown spots on this one's cap, it's really the same mushroom; the nice part is that those spots make it easily identifiable.

  • And last, the Bitter Bolete, Tylopilus felleus. Some folks mistake it for a tasty mushroom, and though it won't do you any harm, it's nasty bitter. Just a touch of the raw mushroom to the tongue leaves a taste that lingers, quite unpleasantly, for a minute or two. Though, should you be one of those rare people who lack the gene for sensing bitter flavors, it's apparently quite choice. Oddly enough.
* * * * *

1They were a great trail snack. Sweet, unmistakably blueberry, and in such near-endless quantities that you could reach down, without slowing your pace, and swipe a small handful to enjoy.

2Which is an entirely inappropriate way to carry a fungus harvest, but I needed my hands for rock scrambling, and I couldn't bring myself to leave it all there.

3In other words, it's not. Given that the world of mycotoxins is poorly understood, at best, and runs the likelihood of being the worst food poisoning you'll ever have.

4Some of mine weren't in prime shape when they got here, and the need to wait until a house full of company had left meant that a few picked up some mold growth. And some were in such small quantities that the half-forkful they'd have been after cooking wouldn't justify the cleanup.

30 June 2008

Daisy.

Lewisburg.

We have a new friend hanging about the house these days:

Daisy

This is Daisy. She's a yellow lab/terrier mix (we think) who came home with us from the Centre County PAWS shelter in State College yesterday. Her goal in life, as near as we can tell, is to be your bestest friend ever. Doesn't matter who you are. Especially if you're willing to rub her belly.

28 June 2008

Backyard blueberries.

Lewisburg.

Blueberry bushes

Boy, when the blueberries are ready for picking, they are ready. A week ago, they were getting dangerously close, and now they're ripe. From two of the three bushes - the third's still ripening - in half an hour's worth of picking, we loaded up on berries for freezing.

Blueberries

So, it was a quart every ten minutes. In addition to the handfuls we ate while picking, of course. After that, we had to call it off so that we could get ready for a picnic this evening; there are still plenty of good berries waiting for us. Which is a good thing, since I'd like to stock up for another year's worth of blueberry pancakes. And cobblers. And jam. And granola. And so on.

13 June 2008

CSA + Pig Parts.

Lewisburg.

'Twas the first CSA pickup for us today, and, all in all, not too bad for the middle of June:

CSA 080613

It's the sort of goodies we expected from the Tewksburys. Clockwise from the left, we have: a head of frisee; a bag of glorious salad mix (full of a wide variety of greens, herbs, flowers, etc.); a bag of spinach; easter egg radishes; carrots; garlic scapes; and, in the middle, shell peas. Having picked all of this up after a (rather restrained) trip to our local growers' market1, it's like a maddening game of Tetris trying to fit it all into the fridge.

Not that the growler of beer I picked up yesterday is helping matters.

And, to be honest, today's market trip was restrained only in reference to vegetables. My "unusual" order of pig parts arrived today, which more than filled the larger of our two coolers.2 Ask for animal pieces usually thrown away, and you shall receive. For the measly sum of $22, I am now the proud owner of half a dozen uncured ham hocks, four pounds of pork liver, about five pounds of pork back fat, and a pig's head. In addition, I picked up some uncured jowls and a shoulder roast - with the liver, for a friend's order for scrapple - and a chicken. Which, with the pork fat, is bound for chorizo.

Honestly, I have no idea how long it'll take me to eat all of this. Good thing I have hungry friends.

* * * * *

1Which, I may have mentioned before, is the closest thing I have to employment these days. It means, in essence, writing the weekly newsletter and maintaining the website. Fancy? No. But recipe research alone keeps me plenty busy.

2Good thing I thought to bring along the backup cooler, too. And that we have a chest freezer to put it all in.

22 May 2008

The backyard.

Lewisburg.

In between the rain showers and gusts of wind, I took advantage of the sunshine to take an amble about the backyard. Among today's interesting sights:

Red peony

The bright red peonies that, one weekend, burst forth from what had looked like an odd, grassless patch behind the deck. And, hiding in the grass near the blueberry bushes:

Little bluebird

A young bluebird, just learning to fly. I'd known that its parents were comfortably nested in the bluebird box, and today's the first day I've seen the female in quite some time. As she and her mate made every attempt to lure me away from the young 'un.

21 May 2008

Duck rinds.

Lewisburg.

There's something undeniably delicious about duck. They're not particularly meaty birds, though what you'll find on one is going to have a deep, almost red-meat-like quality to it. In fact, when I buy one, as I did the other day, I'm rarely planning something like roast duck. A chicken's easier to work with, and can feed more per pound of bird. Not to mention per dollar.

I'm pretty well convinced that the best thing about a duck is its fat. It's tasty enough on the duck, though it can be tough to render enough away during cooking to get the skin all crispy. My solution is to avoid the problem entirely. The legs become confit, which is the tastiest duck preparation I know. And not only does it taste great, but a little goes a long way, enough so that Sharon and I can happily share a single confit duck leg for dinner, using it to accent some carefully-prepared vegetables. The breasts will probably end up cured and smoked, ready to be thinly sliced alongside a cheese plate.

The rest of the bird? Well, the bones are going into stock, but that's not so exciting. But carefully trimmed of skin and fat deposits, it leaves me with:

Duck cracklings

Duck cracklings. They're the duck equivalent of pork rinds. Cut up the skin and fat, render it all down over low heat, and you're left with crispy chunks of duck skin and a significant amount of cooking fat. The duck fat - more than a cup, off of one little bird - will be used at pretty much every opportunity1. The cracklings, just sitting there on the countertop, have long since been eaten.

And though this is a bit of a digression, I must admit that I rather like pork rinds. Though I've never done anything with them remotely as cool as the pork rind reconstruction on Bent Objects.

* * * * *

1By which I mean, every time I remember I have it in the refrigerator. Since olive oil lives within arm's reach of the stove, it's pretty much default when cooking.

19 May 2008

Kimchi. Or something like it.

Lewisburg.

Sometimes, making food takes a little time. Plus a little cross-the-fingers wild hope.

But, aside from burying it in the ground, it's pretty much what I'd imagined making kimchi would be like.

The whole process went like this: Matt wanted to make kimchi. He's made fermented pickles before, as well as various alcoholic beverages1 with varying degrees of success, and this was just another thing to try.

If you're going to make a mess of the kitchen chopping vegetables, you might as well invite some friends. So Karl and I headed over to join in the festivities. Karl's attempted kimchi on two previous occasions, one of which was successful, the other not so much. I have just one failed fermented pickle attempt under my belt. Ruth, our "honorary Korean"2, couldn't attend.

Given that early May isn't vegetable bounty season here in Pennsylvania, we made a trip to the grocery store, pretty much clearing them out of chinese celery cabbage. Measurements weren't really all that crucial3 here, so we picked up some daikon, carrots, scallions, garlic, ginger, and dried chillis. We picked up so much cabbage, in fact, that the scale in the self checkout lane kept getting confused until we split it into four groups for individual weighing.

On day one, we chopped cabbage, grated carrots, sliced daikon and added a hefty salt brine. Matt didn't have measuring spoons, so we just ballparked it:

Kimchi - Day 1

Three containers, full of vegetables and salt water, sat overnight beneath weights. The next day, we drained off the brine and took a taste. The book recommended rinsing only if the cabbage tasted too salty, so we left it as is and started chopping the rest of the ingredients: piles of scallions, a good quantity of ginger and chillis, and loads of garlic. Enough garlic that the entire basement smelled of it for the first day. Maybe it still does, and I'm simply accustomed to it.

With the aromatics went some mashed anchovies, a good dose of fish sauce, and a couple of dollops of fermented red bean paste Matt's fiancee had picked up in Korea. Some more brine went on top to keep it all immersed, and then we covered them back up again. Matt and Karl have been keeping theirs in the kitchen; mine's been living in the basement.

Kimchi - Day 2

In the Fermentarium, to be precise. To digress briefly: the previous owners of our house had the basement enlarged from the contractor's original drawings to create a full-height space instead of a crawlspace beneath part of the house. It had been a wood shop, loaded with all sorts of equipment, and with its own door4. I don't have that sort of power-hungry equipment, so now it's home to lots of shelving that may or may not be used for homebrewing, fermenting pickles, dry-curing meats, aging cheeses, and maybe even some miso. If there's a place in the house for promoting all sorts of microbial shenanigans, it's the Fermentarium.

In addition to letting the kimchi ripen in a cooler place, I added extra salt to my brine to further slow the process. Matt's is already pretty much set, but I'm letting mine get funkier. We compared them last week. The difference wasn't great, but enough that you could tell. We'll try again sometime soon.

In the meantime, I have some pleasantly spicy pickles, redolent of garlic, with a sour pickle funk that evolves every day:

Kimchi

Maybe I'll bury the next batch in the backyard. Just to see what happens.

* * * * *

1Ciders and ginger beer, at least that I've tried. I've yet to have him over for a beer-brewing afternoon.

2She's not the least bit Korean, but she has made successful kimchi before.

3For one thing, we'd left the book with the recipe at Matt's house. Not that it was too terribly specific on this point.

4With a hefty deadbolt on it. This, despite the fact that the exterior access door to the basement had no lock. So, presumably, thieves could walk in and steal anything in the house except the lathe and drill press.

13 April 2008

English muffins.

Lewisburg.

It's taken a couple rounds of recipe tweaking, but I think I can finally say that I've got a pretty good recipe for English muffins:

English muffin outside

This all started when I was researching the baking classes. I made notes on a variety of different bread recipes that I wanted to try for myself at some point - not necessarily for the class - and I've been fiddling with some of them, off and on, for a while. The most important adjustment I've made is to shift most of my breadmaking to weight measurements instead of volume, which means I'm able to produce more consistent results, and I'm more easily able to refine a recipe that's close but not perfect.

English muffins are the perfect example of that. The original recipe came from The World Encyclopedia of Bread and Bread Making by Christine Ingram and Jennie Shapter, a British book with lots of pictures that I'd picked up, years ago, in the bargain section of a Borders or Barnes & Noble. It calls for a cup and a half (or a little more) of milk per four cups of flour1 with a little added sugar - presumably for the yeast. The dough isn't kneaded, but is beaten together for several minutes to make it smooth and elastic. Roll, cut, proof, and cook on a lightly greased griddle.

What puzzled me, though, was that the accompanying picture, of a split English muffin, looks like a flat dinner roll. The interior has the soft, slightly ragged crumb of a kneaded, milk-based bread. Perhaps it's because I've only ever seen the standard Thomas' version, but I expect that crater-like interior. The nooks and crannies, as they say.

So I adjusted. The half-teaspoon of sugar's gone; I don't need it with instant yeast. My electric griddle's non-stick, and easier to clean if I leave it ungreased. And I don't feel like beating the dough for five minutes, so I stop after a minute. If that much.

Most importantly, though, I've increased the amount of milk used, which makes it easier to get those big air pockets inside. As additional insurance, I work the dough as little as possible - so no more punching down to get the bubbles out - and for all of this simplification and work reduction, I'm getting better and better results. This might be the simplest bread recipe I have.

These English muffins are great with butter or jam or both, though my personal favorite is to make egg sandwiches. Fried eggs over easy, with a little bit of a runny yolk, make a fine version, and cheese is definitely a plus. A bit of bacon and a dash of vinegary hot sauce can only improve things. The best, though, is to make little frittatas: scramble together an egg with some milk, cheese, and whatever additional stuff sounds good - last time it was mushroom and onion - and cook on the griddle in egg rings. Less messy than trying to layer it all on top, for one, and they look pretty sharp when stacked up.

English muffin inside
English Muffins
Makes six or seven

Ingredients
  • 270g bread flour (approx. 2 cups)
  • 225g milk, lukewarm (approx. 1 cup less one Tablespoon)
  • 1 teaspoon salt
  • 3/4 teaspoon instant yeast
  • Cornmeal or flour for dusting
Directions
  1. Mix together the flour, yeast and salt in a bowl, whisking thoroughly to combine. Add the milk, stirring until fully incorporated; there is no need to work it until smooth. Cover with plastic wrap and let rise until doubled in size, about an hour and a half.

  2. Turn the dough out onto a floured board, and dust the top with flour. Be sure to use enough flour to prevent the dough from sticking to the board or the rolling pin; this is a time when extra flour is not necessarily a bad thing. Roll out to about 3/8-inch thickness. Cut into rounds with a biscuit cutter. Gently press scraps together, kneading as little as possible, to cut additional English muffins. As with biscuits, the subsequent muffins may be a little more misshapen than the first set.

  3. Let the muffins proof on a sheet liberally dusted with cornmeal or flour, covered with plastic wrap, for half an hour. Meanwhile, preheat a griddle to 325°F (medium heat). Cook the muffins for about eight minutes per side, and allow to cool on a wire rack.
Since I'm one for toasted English muffins, I'm more likely to make these in the evening, but they're easy enough to prepare fresh for a morning brunch. Just reduce the quantity of yeast - a scant half teaspoon, say - and use the milk at refrigerator temperature. Start them before you go to bed, and they'll be set for cutting and proofing come morning.

* * * * *

1Most of the recipes in the book make large quantities of bread, so I've tended to scale them down for my own use.

03 April 2008

Baking Class - Cakes.

Lewisburg.

Well, the baking classes are finished for the semester. Definitely fun while they lasted, though it'll be nice to have Wednesdays back again. Until next semester, anyhow; I've already been offered the chance to do another class then. This time, I think I'll focus on basic cooking techniques.

Which definitely includes a session on how to read a recipe. And another on knife skills. Boy, won't those be interesting.
CAKES
Baking 101 – Spring 2008

ABOUT SPONGE CAKES

The sponge cake, with its variations and eventual reduction to boxed mixes, is the quintessential birthday cake. Though the specific variations are many, they tend to fall into two distinct categories: American and European. The former, which is by far the most common in the United States, has relatively high proportions of eggs and sugar, and rarely contains butter. The texture is moist and tender, and they’re quite good eaten plain, lightly frosted, or with fresh fruit. The European versions, biscuit and genoise, are drier and less tender than the American sponge cake, and are generally components of elaborate desserts. They are often soaked with liquor syrups and layered with rich buttercreams and sliced fruits.

THE INCREDIBLE, EDIBLE EGG

In a traditional, unleavened sponge cake, eggs are primarily responsible for the light, airy texture. This is due to some of the unique characteristics of egg whites and egg yolks, especially when separated. Eggs, perhaps more than any other ingredient, are responsible for some of the most spectacular tricks in the kitchen.

Although it’s possible to find duck, turkey, quail, ostrich and all sorts of other eggs if you know where to look, American cooking depends on the everyday chicken egg. Generally, unless otherwise specified, this means “large” eggs, but it’s possible to adjust quantities if you only have medium or jumbo. Most general purpose cookbooks have conversion charts for just that purpose.

The Yolk. About a third of the contents of the egg, the yolk contains a variety of useful chemical components: water, for the most part; fats; proteins; some cholesterols; and lecithin, a phospholipid that’s remarkably handy for making emulsions like mayonnaise. In most baking recipes, egg yolks provide a rich, eggy flavor; though it’s not apples to apples, think of a sponge cake (with yolks) compared to an angel food cake (whites only). There are exceptions, such as zabaglione and sabayons, which use heated, whisked yolks to create a silky foam, but egg yolks are primarily a source of flavor and a texture enhancer.

The White. The other two thirds of the egg, the white contains: lots of water, around 90%; trace amounts of vitamins, minerals, fatty materials, and glucose; and several different proteins that help produce, set, and stabilize foams, among other culinary tasks. Whole eggs can be used in custards, where the proteins, when carefully cooked, will set into a smooth gel; they can even be used to create an airy foam when heated properly, as for a genoise cake. But egg whites alone are capable of producing foams unlike anything else in the kitchen.

It’s a simple experiment to create foam from egg whites. Just whisk vigorously in a bowl, and they will first start to foam with large bubbles that soon multiply into smaller and smaller bubbles. Eventually, the bubbles themselves become too small to see, and the foam expands and expands, reaching eight or more times its original volume. Like any foam, from soap bubbles to whipped cream, this will settle and separate over time, and so needs to be consumed quickly or set, either with the addition of starches or gelatin, or by the application of heat. Heat, in particular, is a permanent change, as the proteins unfold and coagulate, reinforcing the bubbles walls into a solid, airy form.

Aside from the difficulty of whipping an egg white foam by hand, there are several basic chemical components that can help or hinder the creation of the foam. The basics are:
  • Egg yolk. The fats within the egg yolk will prevent the formation of a foam by competing with the egg white proteins in the spaces where they want to connect, without offering any structural support. When heated, the yolk’s proteins can overcome some of this problem, but as a rule it’s best to whip an egg foam in a clean bowl, free of traces of yolk. Yolk doesn’t pose a problem once the foam has formed, but only at the outset.

  • Oils and fats. These have the same effect as egg yolk, so it’s best to be careful. They won’t absolutely prevent foaming, but they’ll make it much, much more difficult.

  • Detergents. Chemically similar to fats, which is one reason they’re so great at removing grease, detergents cause the same problems with foam formation, so be sure to rinse and dry bowls well. Plus, they taste truly awful.

  • Salt. Salt weakens the overall foam structure by competing with proteins for bonding sites, making it harder to whip and less stable. Salt should be added to the other components of a dish, rather than the foam.

  • Water. Though very few recipes call for water, it can be used to create a lighter, airier foam by diluting the egg white proteins. These foams are less stable, however, and too much will keep them from forming.

  • Sugar. Sugar can both help and hinder. If added at the start, it will delay foaming and reduce the overall lightness; some recipes call for this, in order to create a firm, dense foam, but it doubles the work. If added once the foam has started to form, often at the soft peaks stage, sugar can help to stabilize a foam. It does this by holding on to water, preventing it from draining away.

  • Acids. Although proteins are responsible for foam formation, they can also cause its downfall by swapping out the existing sulfur-hydrogen bonds in the egg proteins for sulfur-sulfur bonds with adjacent proteins, squeezing out the air. Adding more available hydrogen, in the form of a little acid, greatly minimizes that process. Per egg white, use ½ teaspoon of lemon juice or 1/8 teaspoon or cream of tartar, a salt made from tartaric acid, a winemaking byproduct.

  • Copper. Cooking tradition sometimes calls for whipping egg whites in a copper bowl, which produces a more stable foam. This works because the copper binds to sulfur, doing the same work as a little added acid. Silver works, too – but since bowls made from either are inordinately expensive, you’re best off with a pinch of cream of tartar.
One last note on eggs: the proteins in both the yolk and white are temperature-sensitive. Too much heat will cause them to curdle, which is undesirable in just about every instance except scrambled eggs. When recipes call for mixing a hot liquid with eggs, they need to be tempered first. To do this, add a small amount of the hot liquid to the eggs, whisking thoroughly. This will help raise the eggs’ temperature without overcooking them, so that they can be added to the hot liquid without curdling.

CAKE FLOUR

Cake flour is an innovation from the early 20th century, made from very finely milled, low-protein wheat flour. It’s strongly bleached with chlorine dioxide or chlorine gas, which enables the starch to absorb water much more readily in the presence of large amounts of sugar, and allows fats to bind more readily. It isn’t directly interchangeable with pastry or other low-protein flours, although it is possible to use all-purpose or pastry flour mixed with corn, potato, or arrowroot starch. Some cakes are even made with no flour at all, but use only pure starch or similar ingredients, such as chestnut flour.

ICINGS

Icings originally began as a means to keep the food underneath from drying out. The first were simple syrup glazes, though they’ve now evolved into a more elaborate variety of choices. Typical icings are made from powdered sugar, a little water, and sometimes some added fat, often butter or cream. Some may include corn syrup, which helps prevent the sugar from forming coarse crystals, creating a glossy surface; the added fats will also help reduce sugar crystallization.

Some simple icings may simply take a fat (solid at room temperature) such as butter, cream cheese, or vegetable shortening, and whip in air and sugar to create a sweet, light, spreadable mass. In this case, the sugar crystals must be ground fine to keep them from feeling grainy on the tongue; the finer grades of powdered sugar are the common choice. Other frostings require cooking, and typically use egg proteins or flour starches to create body. In these kinds, sugar crystal size is unimportant, because the sugar is dissolved in liquid during the cooking process.

Some of the common types of cake icings and frostings include:
  • Fondant. A version of fondant candy, which is often used as a filling or a coating for other candies. It produces a translucent, satin glaze typical of petits fours and some European cakes. The icing differs from the candy filling in that it is warmed and thinned with a simple syrup to a pourable consistency. Given the clarity of the finished glaze, it cannot be used to hide imperfections; it is sometimes applied over a layer of buttercream or other frosting that gives a smooth, even appearance.

  • Buttercream. One of the classic frostings for decorative cakes, buttercreams require mixing a cooked sugar syrup into beaten eggs (or egg yolks), then working in a large quantity of butter to produce a smooth, spreadable frosting. Due to the large proportion of butter, the consistency of buttercreams varies with temperature.

  • Ganache. The same as the center of a chocolate truffle, a ganache is a mixture of chocolate and heavy cream. Butter can be included in addition to or in place of the cream, with similar results. Typically, the chocolate is chopped into fine pieces, and hot cream is poured over, melting the chocolate; different proportions of chocolate and cream will give different consistencies. Most versions are pourable when warm and spreadable when cooled to room temperature.

  • Quick. “Quick” icings rely on the thickening ability of the cornstarch in powdered sugar. The typical ratio is approximately a quarter pound of butter to a pound of powdered sugar, with just enough added liquid to thin the consistency to the desired point. These icings may be cooked or not; cooking is done in a double boiler to avoid melting the sugar, which would make the texture grainy.

  • Cream cheese. Cream cheese frostings are essentially sweetened, butter-enriched cream cheese, beaten to a smooth texture. Quick and easy, they are prone to overmixing, which can break down the cream cheese and make the frosting too soft to hold its shape. Cream cheese frostings, since they don’t depend on the chemical properties of sugar to form their structure, can be made anywhere from barely to very sweet.

  • Royal icing. Unlike most other icings, royal icing is primarily for decoration, rather than for eating. A mixture of egg whites and sugar, it is extremely stiff and traditionally used to create ornate detailing for wedding cakes. It dries hard and pure white, which looks elegant, but it tastes like hard, chalky sugar.

  • Sugar glaze. Sugar glazes are basically simple sugar syrups, which can be used to create a thin, translucent glaze over the surface of a cake. These are typically used for plain, rich cakes that need little extra adornment, such as pound cake, to provide a shiny crust and a hint of additional sweetness.
TYPES OF CAKES

The term “cake” may describe any of a wide variety of baked goods, ranging from quickbreads – such as coffee cake – to unleavened, egg-foam mixtures like a true sponge cake. Even dense confections, such as flourless chocolate cakes and fruit cakes fall into the general category. Cheesecakes, despite the name, are cheese and egg custards, not cakes; only the general shape and typical wedge servings are cake-like.

Just some of the possible examples of cakes include:
  • Quick cakes. Quick cakes are, as the name suggests, quick and simple to prepare. Though considered cakes, they are prepared in much the same manner as quickbreads. Sometimes baking in a cake pan or the addition of a layer of icing is all that separates the two groups. Some examples include apple cake, carrot cake, and virtually all vegan cake recipes, which cannot include any dairy or eggs.

  • Gingerbread. Gingerbreads are some of the oldest varieties of baked goods, with the exception of breads. Like quick cakes, they are easy and fast to prepare, and there are a wealth of different ways to make it. What all have in common is the use of spices, including ginger – sometimes dried, sometimes fresh – and molasses, which provides much of the characteristic color and flavor. Gingerbread batters also tend to be thinner than many other cake batters, which can make them more prone to overmixing and toughness, so it’s best to use a light hand when mixing.

  • Pound cakes and butter cakes. Pound cakes, known as quatres-quarts in French (four quarters), are so called because the original recipe called for four ingredients: a pound each of flour, sugar, butter and eggs. Since the invention of baking powder in the mid-nineteenth century, recipes for pound cakes and the related butter cakes have become much more varied, including a wide range of ingredients in the lighter, much easier to prepare, versions. Due to the high proportion of butter in these cakes, the taste and quality genuinely suffers when replaced with shortening or margarine.

  • Foam cakes and sponge cakes. Foam cakes, of which sponge cakes are a subset, are based on a high proportion of eggs. Beating eggs (or just whites) into a stable foam provides the delicate structure and most, if not all of the leavening; some recipes call for additional baking powder for added lift. American sponge cakes are light, delicate and moist; European sponge cakes, such as genoise and biscuit, are drier and less tender, though no less flavorful.

  • Chiffon cakes. Chiffon cakes are a variation on foam cakes invented in 1927 by Hollywood insurance salesman Harry Baker, who catered cakes for private parties on the side. The key difference is that the fat used is oil, rather than butter or shortening, which can’t hold onto bubbles like solid fats can. The egg foam, bolstered with baking powder, gives a chiffon cake its lift and lightness; oil lends it moistness, even when refrigerated.

  • Angel food cakes. Angel food cakes are essentially sponge cakes without the egg yolks or butter. This makes for an exceptionally delicate and airy cake, and fat-free to boot. Angel food cakes are cooked in a specific pan just for the purpose, a tube pan with a removable bottom.

  • Cupcakes. True cupcakes can be made from any cake recipe, baked in muffin pans; most have a top layer of icing, though this isn’t strictly necessary. As cakes will go stale more quickly than muffins of the same size and shape, paper liners do a good job of keeping them moist and fresh longer.

  • Fruitcakes. Fruitcakes are essentially butter cakes liberally studded with fruit, either dried or candied, and nuts, then often soaked and preserved by soaking in spirits. When made from good ingredients, a fruitcake can be a rich, intense dessert for a holiday or other special occasion. Some recipes are even intended to mature over a period of a year or more; they’re often recipes surviving through generations, originally intended as a way to preserve a bountiful fruit harvest throughout the year.

  • Flourless chocolate cakes. Like sponge cakes, flourless chocolate cakes or tortes rely on egg foams to provide leavening. Without the structural backbone of flour’s starch, however, these cakes are much denser and moister. They also tend to be extremely rich, with large amounts of eggs, butter, cream and chocolate, though often not overly sweet.

AMERICAN SPONGE CAKE
Adapted from The Joy of Cooking
Serves 8 to 10

INGREDIENTS
  • 1 cup sifted cake flour
  • ¼ teaspoon salt
  • 1 cup sugar
  • 7 large egg yolks
  • 1 teaspoon vanilla
  • 1 teaspoon lemon zest
  • 1 teaspoon orange zest
  • 3 tablespoons water
  • 7 large egg whites
  • ½ teaspoon cream of tartar
DIRECTIONS
  1. Have all ingredients at room temperature. Preheat the oven to 325° F. Have ready an ungreased 9-inch springform pan. Sift together the flour and salt three times, then return to the sifter.

  2. In a bowl, whisk together the egg yolks, 2/3 cup sugar, and the vanilla until thick and pale yellow. Beat in the lemon and orange zest and water. Sift the flour mixture over the top, but do not mix in.

  3. In a large bowl, whisk together the egg whites and cream of tartar until soft peaks form. The add the remaining 1/3 cup sugar and beat until the peaks are stiff, but not dry. Using a rubber spatula, fold one quarter of the egg whites into the yolk mixture. Then fold in the remaining whites.

  4. Scrape into the pan and spread evenly. Bake until the top springs back when lightly pressed and a toothpick comes out clean, about 40 to 45 minutes. Allow to cool upside down for at least an hour and a half. Unmold by sliding a thin knife around the edge to detach the cake from the pan; remove the pan side and bottom and allow to finish cooling right side up on a rack.
NOTES
  • This cake must cool upside-down for at least ninety minutes to retain its delicate texture. Until the protein/starch network has cooled, it cannot even support its own weight and will deflate. Likewise, the cake pan must remain ungreased, lest the warm cake simply fall out while cooling upside-down.

  • Store this cake covered, at room temperature. A layer of icing will help prevent the cake from drying out.

QUICK ICING
Adapted from The Joy of Cooking
Makes about 1 cup

INGREDIENTS
  • 2 cups powdered sugar, sifted if lumpy
  • 4 Tablespoons unsalted butter, softened
  • 3 to 4 Tablespoons milk
  • 1 teaspoon vanilla
  • 1/8 teaspoon salt
DIRECTIONS
  1. Beat together the sugar and butter until smooth. Add the milk, vanilla, and salt and beat until smooth. Adjust the texture with additional powdered sugar or milk if necessary.

  2. To store, cover the surface directly with plastic wrap. This will keep for three days at room temperature or three weeks refrigerated. Before using, soften and stir until smooth.
NOTES
  • The icing will thicken as it stands, so it’s best to work quickly when icing cakes, especially those with a delicate texture. Thorough stirring will help loosen it up, as will the addition of a little extra liquid to thin it out.

30 March 2008

More on Wisconsin cheese.

Lewisburg.

The New York Times gives a nod to some of Wisconsin's finest cheesemakers, many of whom I can wholeheartedly support: Fantôme; Bleu Mont; Hook's; Dreamfarm; Uplands; Carr Valley. The last of which is mentioned in conjunction with their "Cocoa Cardona" cheese, a fine example of the new Wisconsin artisanal cheese world that happens to be in our refrigerator. (It's available at Wegman's sometimes - so is the Uplands Pleasant Ridge Reserve, among others.) So, to those who can still buy these phenomenal cheeses on a weekly basis, do know that I'm jealous.

27 March 2008

Baking Class - Cookies.

Lewisburg.

Sharon asked me, as I was headed out the door to teach my students how to make chocolate chip cookies, if I thought we'd even make it past the cookie dough stage. I'm pleased to say that we did make quite a number of cookies, though at least one student went home feeling woogy from eating too much dough. Here're the baked results:

Chocolate chip cookies

Those are all student-baked cookies, in their chewy, crispy, and cakey variations (left to right). Granted, they do seem to have a little trouble with reading and following simple directions1, but everything still worked out pretty well. Especially when I'm leaning over shoulders so that I can call things to a quick halt if necessary. In the next series of classes, it looks like I'll need to spend some time discussing how one is actually supposed to read a recipe.
COOKIES
Baking 101 – Spring 2008

ABOUT DROP COOKIES

Although there are many, many different kinds of cookies, drop cookies are some of the most common ones in America. Usual examples include oatmeal raisin cookies and the ever-popular chocolate chip cookies. Like almost all cookies, they contain significant amounts of fat and sugar in proportion to flour, which make for a distinctive rich and sweet flavor. Beyond that, however, a range of ingredients and mixing techniques can produce cookies with a great diversity of textures. Drop cookies constitute a group – one with a wide range of flavors and textures in it – made from a soft dough that is scooped onto a baking sheet by the spoonful. During baking, these round balls of dough spread out into the characteristic cookie shape.

THE CREAMING METHOD

Creaming is essential to making a good drop cookie. Unlike in yeast breads, where the kneading process develops lots of tiny air pockets to be filled with expanding leavening gases, cookies need to have air bubbles worked inside without creating gluten. This process, called creaming, mixes the cooking fat, usually butter, with sugar; as the two are mixed, the rough edges of the sugar crystals tear tiny holes into the fat. As these holes seal over, they trap in tiny bubbles of air. You can see the effect of this as the volume of the sugar/fat mixture expands by up to a third and the color of it lightens. During baking, these pockets expand, raising the cookies and giving them their characteristic lightness.

Creaming can be done by hand, or with an electric mixer. If creaming by hand, always be sure that the butter is fully softened before working it; softened butter is at the stage, about room temperature, where it is soft and malleable without melting. Electric stand mixers work best, and can effectively cream even cold butter, although they’re quite expensive. An electric hand mixer doesn’t do the best job, due to the shape of the thin metal beaters, but is a fair compromise between cost and arm power.

DROP COOKIE VARIATIONS

Drop cookies are easy to make, and easy to adjust to your particular taste. Here are a few ways to modify the basic chocolate chip recipe below to get different final results:
  • Flour. Cake flour can hold less moisture than all-purpose, which leaves more of the water in the recipe available for steam; hence, cake flour produces puffier, cakier cookies. Bread flour is more likely to produce gluten, and so will make chewier cookies. It also holds on to more moisture, resulting in a slightly moister cookie.

  • Sugar. White sugar, for various reasons, helps cookies to spread while baking, and produces a crispier cookie once cooled. Brown sugar, due to the presence of molasses, holds on to much more moisture, resulting in a moister, chewier cookie. By tipping the ratio of white to brown sugar in one direction or the other, you can change the final cookie texture.

  • Fat. Butter has a relatively low melting point, which allows cookies more time to spread before setting during baking, making for flatter, crispier cookies. Margarine and shortening melt at higher temperatures, allowing more time for the cookie to rise, and less to spread, producing cakier cookies. Melting the butter before mixing with the sugar will produce very few bubbles during creaming, making for a denser, chewier cookie.

  • Leavening. Baking soda raises the pH of the dough, resulting in a higher set temperature during baking; this gives the cookies more time to spread. Increasing the quantity of baking soda by up to fifty percent will make for crispier cookies. Baking powder, on the other hand, doesn’t affect the pH of the dough, which allows for a lower set temperature. This, combined with its extra leavening power, causes cookies to rise more, producing a cakier texture. Replace the baking soda one-for-one with baking powder for this effect.

  • Eggs. Eggs tend to produce puffiness in baked goods, so replacing one egg with ¼ cup of milk will make for a flatter, crispier cookie. Egg whites also tend to dry out baked goods, so replacing one egg white – while keeping the yolk – with 2 Tablespoons of milk will make for a chewier cookie.

  • Other ingredients. Chocolate chips can be replaced with nuts, raisins, or anything else that happens to sound good. Likewise, the vanilla can be replaced with an equal quantity of another extract, spirit, or liqueur; the use of orange extract, bourbon, or even strong coffee can add a subtle but interesting variation to the usual chocolate chip cookie flavor. Finally, it’s simple and easy to add ground spices to the dry ingredients to change the flavor. Anything that goes with chocolate, from cinnamon to chilli peppers, works well.

  • Temperature. Cold dough will spread less in the oven, as the exterior sets quicker compared to the center of the cookie. For a cakier cookie, place the mixed cookie dough in the refrigerator to cool before baking.
TYPES OF COOKIES

There is a near-endless variety of cookie recipes available, with many, many different ways of preparing them. American cookies tend to fall into five basic categories:
  • Drop cookies. Chocolate chip and oatmeal cookies, among others. These are made from a soft dough that is scooped onto a baking sheet by the spoonful.

  • Cut-out cookies. Sugar cookies and butter cookies. Made from a stiffer dough than drop cookies, which allows it to hold shape while baking, these are rolled out and cut into shapes with cookie cutters.

  • Hand-shaped cookies. Ladyfingers and madeleines. These are made from batters that are stiffened by chilling, then piped or molded into shape before baking.

  • Bar cookies. Brownies and nut bars. These cookies are shaped after baking, when cut from a pan. They are baked from a batter spread in a shallow pan, and have a cake-like quality.

  • Icebox cookies. These cookies are pre-formed into cylinders, often wrapped in parchment or wax paper, and kept in the refrigerator or freezer. Cross-section slices can then be cut and baked as needed; many cookie doughs can be treated this way.

CHOCOLATE CHIP COOKIES
Adapted from the classic Nestle Toll House recipe
Makes five dozen cookies

INGREDIENTS
  • 2 ¼ cups all-purpose flour
  • 1 teaspoon baking soda
  • 1 teaspoon salt
  • 1 cup butter, softened
  • ¾ cup granulated sugar
  • ¾ cup packed brown sugar
  • 1-½ teaspoons vanilla extract
  • 2 large eggs
  • 1 12-ounce package chocolate chips
DIRECTIONS
  1. Preheat the oven to 375° F. Cream together the butter and sugars in a large bowl, until the mixture has increased in volume and lightened in color. Add the eggs, one at a time, incorporating each fully before adding the next. Add the vanilla.

  2. Combine the flour, baking soda and salt in small bowl. Mix into the butter mixture in three parts, making sure each is fully incorporated before adding the next. Stir in the chocolate chips. Drop rounded tablespoonfuls onto ungreased baking sheets.

  3. Bake for 9 to 11 minutes or until golden brown; when the edges start to brown, but the cookie is still slightly soft in the center, they’re done. Cool on baking sheets for a moment to firm a bit before removing to wire racks to cool completely.
NOTES
  • When spooning out cookies onto baking sheets, make sure that all of the scoops are the same size to ensure all the cookies finish at the same time. If possible, use a disher scoop to be sure. Larger and smaller cookies will bake up just fine; adjust the cooking time appropriately.

CHOCOLATE CHIP BISCOTTI
Adapted from How To Cook Everything
Makes fifteen to twenty biscotti

INGREDIENTS
  • 2 Tablespoons unsalted butter, softened, plus more for greasing baking sheets
  • ¼ cup plus 2 Tablespoons granulated sugar
  • 1 large egg
  • ¼ teaspoon vanilla extract
  • 1 cup plus 2 Tablespoons all-purpose flour, plus more for dusting baking sheets
  • 1 teaspoon baking powder
  • Pinch salt
  • ¼ cup chocolate chips
DIRECTIONS
  1. Preheat the oven to 375° F. Cream together the butter and sugar in a large bowl, until the mixture has increased in volume and lightened in color. Add the egg and vanilla, stirring until fully incorporated.

  2. Combine the flour, baking powder, and salt in small bowl. Mix into the butter mixture in three parts, making sure each is fully incorporated before adding the next. Stir in the chocolate chips.

  3. Butter a baking sheet and dust with flour; turn it over and tap gently to remove any excess. Shape the dough into a log approximately 3 to 4 inches wide, and about an inch thick. Place onto the baking sheet and bake for about 30 minutes, or until it is golden and beginning to crack.

  4. Remove from the oven, and lower the temperature to 250° F. Allow the loaf to cool until easy to handle, and cut along the diagonal into ½-inch slices with a serrated knife. Place the slices back on the baking sheet and return to the oven to dry, about 15 to 20 minutes, turning once. Cool on a wire rack.
NOTES
  • Not all biscotti recipes call for butter; here, it helps to tenderize them. Butterless (or other low-fat) biscotti recipes are quite crunchy, and often need to be dunked in coffee to be eaten.

  • A single cookie is called a biscotto. Biscotti is plural.
* * * * *

1Sharon confirms that this is often the case in math classes, too.