Bread. Good stuff's hard to find around here, it seems, so I bake most of what we eat.1, 2 This is not, of course, unusual - I've been baking bread for the past dozen years or so - but I've been making steady progress ever since. I started using the Tassajara Bread Book, so beloved of crunchy hippies, and the Joy of Cooking. Both are fair enough for a place to start, and will get you far enough to make soft-textured loaves with a fine crumb that's delicious lightly toasted, spread with butter and jam.
But I couldn't do much else with that. Crusts were soft, and sometimes thick. The color was always a dull, pale brown. Baguettes were an impossibility, but I didn't know why.
The big step came with the no-knead recipe Mark Bittman wrote about in his Minimalist column. Crisp crust! Tender, airy, irregular crumb! No more confusing kneading!3 Suddenly, I could make more than kind of bread. I don't make that recipe much anymore, but I do use the container baking method from time to time. Two loaf pans, held together like a clamshell with binder clips, are my preferred method for sandwich loaves.
Now I'm following Jeffrey Hamelman's lead. His book, Bread, is for serious home bakers and professionals, and it really rewards precision and care. Those breads I can't bake now are so only because I haven't had the practice - I'll get to brioche when I get there, but it's not top priority.
Today's new experiment was with soaked grains, inspired when a friend asked for some advice on moving beyond the basic no-knead bread recipe. I've been making breads with a variety of flours for a long time, but other than rolled oats, large grains had never been in there. Now, though, they will be.
Soaking's stupid-easy. Soak grains overnight in water, and add to dough. Then they aren't texturally offensive, but flavorful and part of the bread. Rolled oats are never going in un-soaked again.
More specifically, you need to account for the weight of the grains when calculating water and salt. Any water that's not going into a pre-ferment goes here, as does all of the salt. Salt slows enzymatic and microbial activity, so there's no unexpected sourness. Make it at the same time as a pre-ferment - I like poolishes - and let 'em sit out, side by side. Here, I used 5% rolled oats and 5% bulgur, which are good soaked in cold water. Wheat and rye berries, being much tougher, would need boiling water to soften sufficiently.
The rest of the dough was 80% all-purpose flour, 10% whole wheat flour, 10% whole rye flour, and 69% hydration. My usual method is to use 50% pre-fermented flour, as a poolish at 100% hydration. If I'd been using more whole grains than 10%, I might have needed to use a drier pre-ferment to have enough moisture to accommodate the soaking.
Knead, rise, fold, etc. I let the loaves do their final proof in bannetons:

I love these things. They're not cheap, but the resulting loaves look fantastic. I've found that I'm better off slashing these and moving them into the oven earlier than I would other loaves, because getting a good-looking score pattern's not my forte. (Again, practice. I can't get enough.)
The bannetons - or brotformen, auf Deutsch - came from Fante's. I use these large round ones for my typical 450g loaves4, but I have a pair of smaller rounds that get occasional use, as well as a triangle and a torus that were gifts. I don't bake in them as often, but the resulting loaves are pretty sweet.
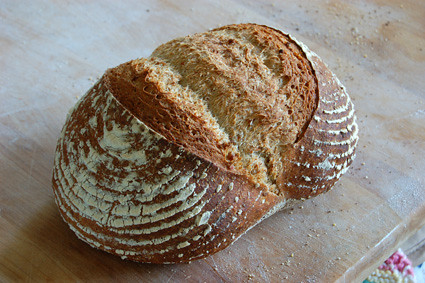
As for this one:
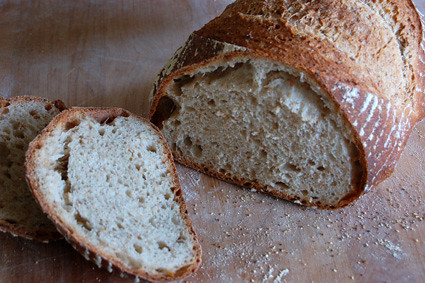
Aside from the dark flecks from the bulgur, you can't tell there are whole grains in here. They're seamless in the crumb. Flavorful, but otherwise invisible.
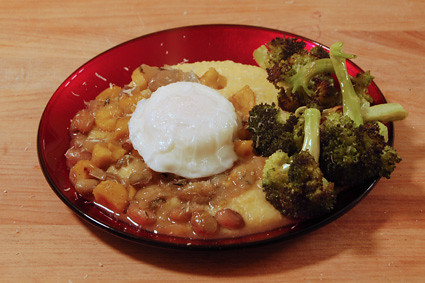
Perfect for tonight's dinner: lentils, kale, and some fresh Brie.
* * * * *
1Sometimes, we're able to buy good loaves from Gemelli Bakery in State College, but that's limited by: season (they attend our weekly growers' market); availability (they're not there every week; we're not able to make it every Friday, either); and demand (since they do sell out). Gemelli bakes some loaves that I'm not up to speed on - especially big, airy loaves like their ciabatta - so that's an occasional treat.
2One of the best bread-related moments we've had: Sharon's sister's sheer befuddlement that we had made Thanksgiving stuffing from a loaf specifically baked for that purpose. She simply couldn't get over it - never mind that I'd made everything else on the table from scratch.
3Kneading's tough. Not the actual act, but knowing when to and when not to. Knowing how much. When you only bake bread every once in a while - and unless you're baking professionally, once a week is frequent - acquiring the sense for it takes forever.
4I think of them in terms of the total flour weight. Final loaf weight's about a pound and a half.