
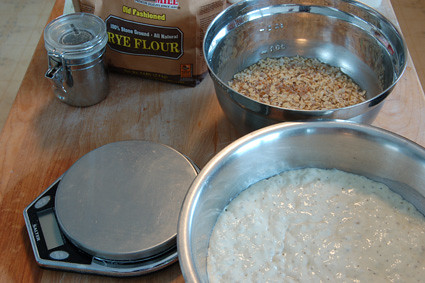
Yesterday was, among other things, a bread-baking day. A short trip into work, followed by a casual breakfast, then a retreat from the ice, rain, and damp. Despite the fact that the entire process takes several hours, it only occupies the hands and mind for brief intervals, and so really lends itself to a day of chores and minor tasks about the house. In addition, I've been doing what I can to teach my friend Seth to bake bread - from a thousand miles away - and figured that a little photography was in order.
The day before, I started things in motion. I scribbled down a recipe, to start.1 Cleaned up, it looks like this:
Total:
585g AP flour (65%)
225g whole wheat flour (25%)
90g whole rye flour (10%)
45g bulgur wheat (5%)
45g rolled oats (5%)
45g polenta/grits (5%)
725g water (81%)
20g salt (2.2%)
1-¼ tsp. yeast, plus a pinch
Poolish (35%):
315g AP flour
315g water
Pinch yeast2
Soaker:
45g bulgur wheat
45g rolled oats
45g polenta/grits
20g salt
410g water
Final add:
270g AP flour
225g whole wheat flour
90g whole rye flour
1-¼ tsp. yeast
The soaker and poolish need sixteen-plus hours' worth of a head start, so I try to get them going around lunchtime the day before baking.
The poolish is a high-moisture pre-ferment, which gives the bread more flavor and more staying power. I prefer poolishes to a thicker pate fermentee or biga, because they're easier to mix. But I'll use whatever suits. As it ripens, the poolish looks like the top of a pancake:
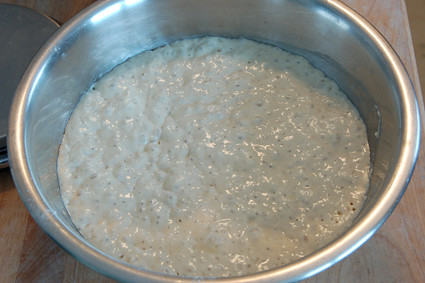
It's just flour and water, in equal proportions, with a little bit of yeast. The rest of the dough's water and the salt are in the soaker:
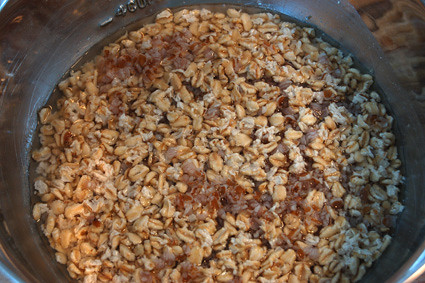
This ensures that the large grains in the loaf are well integrated, which isn't guaranteed otherwise. Notice how the rolled oats have plumped? And how the bulgur is exploded almost like popcorn? They're full of moisture, and won't rob it from the dough. They also won't remain firm and crunchy in the crumb, or threaten to tear the dough as I work it.
After a long rest, I combine these with the remaining flours, and more yeast to raise the dough. I like using an electric stand mixer and dough hook for kneading, especially for a batch with multiple loaves, or very wet doughs.3 So after about five minutes with the dough hook, here's the shaggy mass of dough:
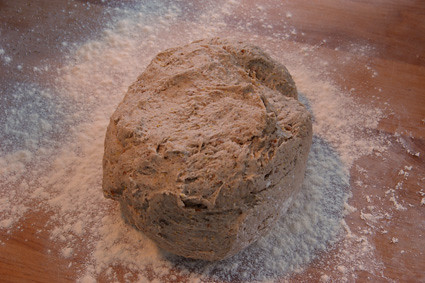
There's no form to it, but the gluten structure is apparent. As I don't like oiling bowls, like a lot of bread recipes suggest, I prefer to give a fold here, which adds enough shape and structure that the dough slides easily from bowl after the first segment of its rise.
To fold, there are a hadful of different methods, but I use Jeffrey Hamelman's. It's a little more involved, but I find that it does an excellent job of strengthening the dough. Since it folds over dough from four directions, 90 degrees apart, everything's very evenly balanced when going back into the bowl. I don't find it necessary to reshape the dough into a ball after this, since the primary fermentation time really seals up the edges.
Here's after the second fold, 50 minutes later. There's been a slight increase in volume, more noticeable to my hands than my eyes.
You might notice the brush sitting on the board here. I use it to brush excess flour from the dough, as it does a much more thorough and much gentler job of it than my fingers.
After another 50 minutes, the third fold. There's a significant volume increase here, even after degassing. The strengthening dough is also pulling itself closer to a sphere.
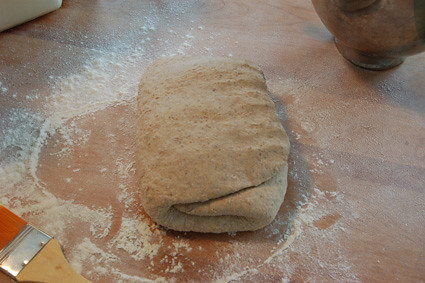
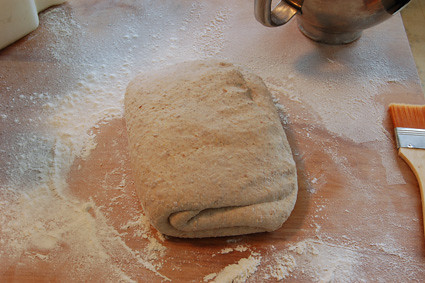
The last 50 minutes of primary fermentation pass, and it's time for a fold, dividing, and pre-shaping. I wanted to use my small, round bannetons, so I've divided this batch into three loaves. Two will do their final rise in the bannetons, and the other will just be a boule.
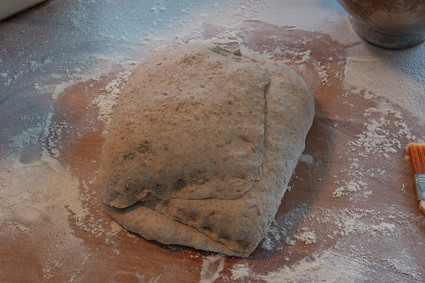
These sit on the board, seam side up, and covered, for about 15 minutes. Since they've been through a bit of handling - a fold prior to dividing, and another after - the gluten's tight. If I work them too much, I'll tear the smooth skin that's forming the surface of the loaf. So they sit until the gluten relaxes, and I can finish shaping them.
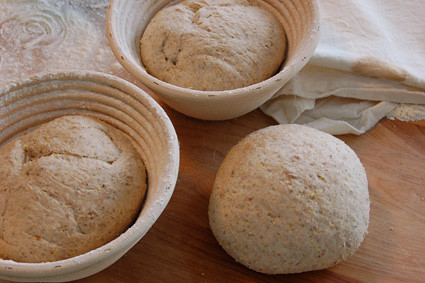
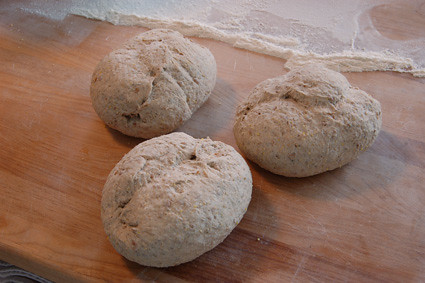
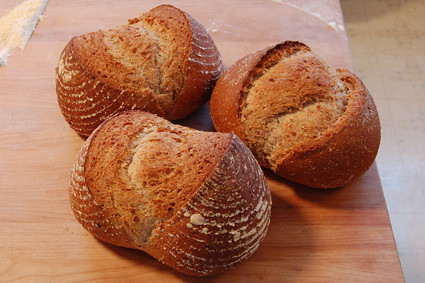
The floured bannetons hold the loaves upside down, lending them some shape and the distinct spiral flour pattern. The boule - sitting upright here - will rest upside down, wrapped in floured linen to prevent it from drying out. The final rise will take about and hour and a half in the cool kitchen, before they're ready for baking.
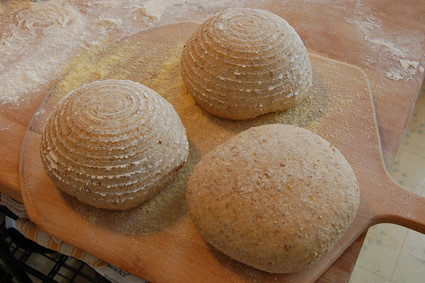
Note that the banneton loaves are a little taller, a little less sprawled than the boule. They're all the same, within a few grams, but the difference in form is umistakable.
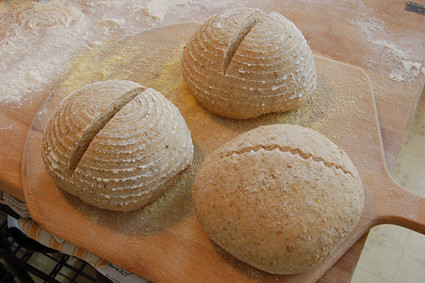
A few moments later, the loaves with scoring. These are fairly deep cuts, made with a standard hardware store single-edge razor blade, because I know they're going to expand significantly. For larger boules, I tend to make an X shape across the top, which provides more room for expansion, but the single slash does make them easier to slice later.
The loaves proofed in the bannetons have been scored with the blade perpendicular to the loaf's surface, to nearly an inch at the deepest point. The other boule is a test, using the blade at about 30 degrees up from the surface, making just a shallow cut. Maybe a bit over a quarter inch. When this works properly, it forms a lip that continues to expand, giving more room for oven spring than it would seem to suggest. It's a trick used for long loaves, but there's no reason it won't work here.
That waviness along the edge is a result of me trying to match the curve with a stiff wrist. I find that my scoring is far more effective when I keep my hand and wrist stable, letting my whole arm move. The blade seems to cut so much better this way.
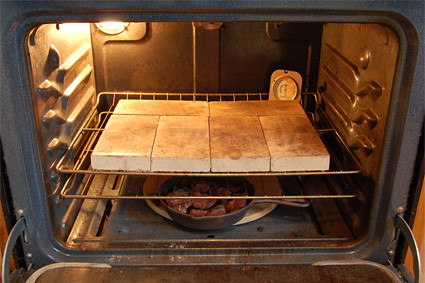
Then it's into the preheated oven. This is my best attempt at creating a baking hearth at home. Six firebrick splits - half-thickness refractory brick4 - to serve as a base hearth, with space for air circulation around. A cast-iron skillet filled with lava rocks for steam generation. An oven thermometer. A (slightly damaged) pizza stone that lives on the bottom, permanently, for a little more thermal mass.
The bricks hold a great deal of heat, and are able to absorb moisture from the baking bread, resulting in a superior crust. They need a while to preheat, so I'll give them at least an hour to get up to the 450°F that I prefer for most breads.5 They also stay hot for some time after the oven is turned off, so I do need to plan dinner after baking accordingly.
The skillet and lava rocks - intended for gas grills - are there to generate steam early in the bake. They preheat with the oven, so that water poured over top has plenty of surface to evaporate. This gives better oven spring, and a nicer, thinner, crispier crust. I also use a spray bottle to hit the sides of the oven immediately before loading the loaves in. Another trick - for loaves without a flour pattern on the surface - is to brush them with water just before scoring.
The breads go in on a peel dusted with cornmeal or semolina flour, and bake for about 34 minutes in this case. Shape, size, and temperature determine that. Whole grain flours sometimes darken quickly, too, so I need to watch throughout the bake so that I can turn the oven down if necessary.
Removed from the oven, and cooled on a rack, they're ready to slice. Note the difference between the two scoring methods. Also note that my scoring wasn't quite enough to accommodate the full oven spring. The crust has torn beyond the edge of the cut on all three loaves. I could have avoided that with a longer or deeper slash, additional score marks, or by allowing the loaves additional time for their final rise.
Still, a little tearing there isn't a problem. More of an issue is when there's a blowout along a weak seam - often one not apparent earlier - which just looks a little uglier. It'll still taste great, of course, but those are the loaves I avoid giving away.
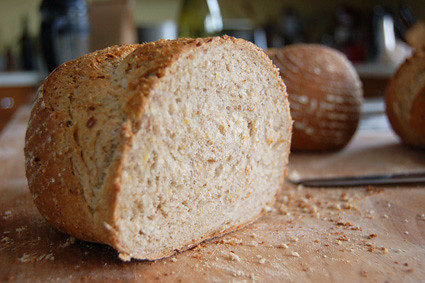
Inside, it's a soft, tender crumb, without any large pockets. For a grain-filled loaf like this, that's my preference. When still very fresh, I like a slice plain, or with a spread of butter. It's also great for sandwiches, just lightly toasted. Any remaining after a few days will end up as croutons, French toast, or a bread pudding.
* * * * *
1I don't always do this. My default is to start a poolish with 450g flour, then figure out the rest the next day, depending on what my schedule looks like.
2It should be about 1/8 tsp., but I didn't bother measuring.
3Exceptions include pizza dough and English muffins. The former gets only folding, but no kneading. The latter gets virtually no handling at all.
4This is important. Refractory brick is intended for high-temperature applications, so it won't explode in the oven. Common brick, which is cheaper and easier to find, can't promise that. The smaller thickness is nice because it's not as heavy. Too much more weight on here, and I wouldn't be certain the oven rack could take the strain.
5Enriched breads, with milk, eggs, and sugar that mighty burn, bake at lower temperatures, and generally not on the hearth. Bagels usually go in around 475-500°F, directly on the stone. Pizzas bake at this oven's full blast, 550°F, on a pizza stone. (It's a more level surface than the bricks.) At that temperature, a pizza is ready in 8 minutes. If I could bake them hotter and faster, I would, but this oven cost enough that I'm not monkeying with it.