25 May 2009

Planters and transplants.

Lewisburg.

It's been a little while since I last wrote anything about the garden, but it's not as though I haven't been busy. It's just that plain dirt doesn't make for the most engaging photos. Now, however, with greenery abounding, I can blather on once more.

Behold, the mighty deck planter:
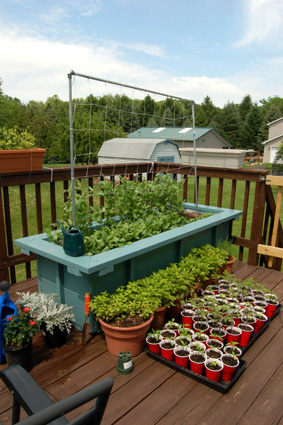
planter

It's actually one of two. Currently, this one holds French breakfast and easter egg radishes, hakurei turnips, broccoli raab, and two kinds of peas: a yellow edible-podded variety from India and a blue shelling variety from the Netherlands, I think. Seed Savers gives the name as Blauwschokker, and it's certainly a shocking sort of blue. I don't know how they taste, since the deer ate the plants last year, but the ornamental blue pods alone are worth the space.

This planter's big, by the way. The plantable area's six feet long, twenty-one inches wide, and eighteen inches deep.1 Big enough to plant just about anything short of a tree, which means I have options. Other than moving them, of course; they're heavy and unwieldy enough empty to require two people to maneuver.

Also visible here: Alpine strawberries, overwintered from last year, and quite vigorous; half of a pot of mint - the other half having moved out to the back garden to take over as much space as it likes; lavender about to flower; a miniature rose for Sharon; and lots of tomato and pepper seedlings.
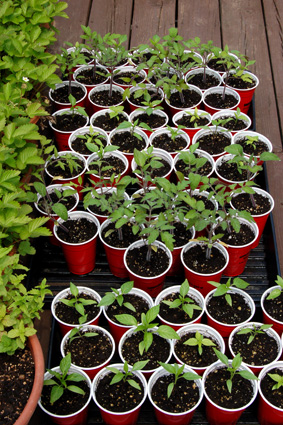
transplants

I took the picture Saturday. Yesterday, the tomatoes moved outside (and into their protective structure, dubbed the "tomato cage"), and the peppers went today. All but for four of them, that is; the Fish and Red Thai chillis will stick around in containers on the deck. Fish, so that they can be seen; Red Thai so that I can ripen them indoors if the weather turns too early. They're hot, delicious, and dry well, and there were far too many sitting green on last year's plants when the frosts overwhelmed the plants.

Meanwhile, it's harvest time for salad greens and radishes, and I had my first ripe strawberry yesterday. (Full-size, not Alpine. Unbelievably good.) At this point, more than half of the season's planting is done, so it's down to trying to protect everything from the critters in the yard so there's enough to harvest. It's a progressive learning experience.

* * * * *

1I got a little carried away, I suppose, but they're really quite nice to have.

20 April 2009

A snapshot of spring.

Lewisburg.

Spring is here. The violets are out:

violet

The crabapples are ready to burst into bloom:

crabapple buds

The thyme is looking bigger and better than it was when I covered it up in the fall:

thyme

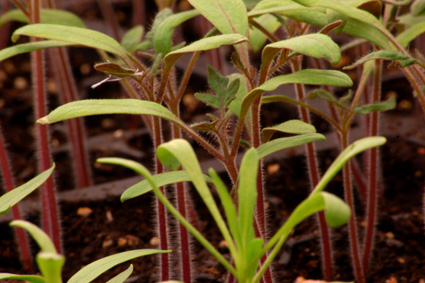
And the grow table is covered in miniature greenery:

Grow table

Complete with lovely little true leaves on the tomatoes.1

Tomato true leaves

True to spring form, it's also raining today, meaning that the radishes, turnips, and shallots can wait a little longer for planting. I doubt they'll mind all that much.

* * * * *

1They're looking even better today. This photo's from a week or more ago, and they're at the point where I need to seriously consider thinning them out.

16 April 2009

Mussels.

Lewisburg.

I love mussels. I realize that they're not for everyone, with a relatively powerful shellfish flavor, and a pretty high "ick" factor for those who're squeamish about where meat comes from, but I just adore them. Even with all of the other seafood options available, it's one that I'll swing back to, time and time again.

For starters, there's less question of freshness and quality with mussels, as compared to, say, fish fillets. They're still alive when you get them, with a handy tag telling you when and where they came out of the water. No concerns about multiple freezings, or sitting too long in the cooler display, or any of that.

Unlike other bivalves, they're sand- and grit-free. As tasty as clams are, it's always aggravating when you realize another change of fresh water would've been appropriate. And they don't require specialized, hand-puncturing knives1 to enjoy, unlike oysters. Also: no little hidden bones or other, uh, textural surprises.

The sand-free benefit comes from the cultivation method used, which involves suspending ropes seeded with mussel spat from rafts, thus keeping them well away from the ocean floor. This gets mussels a big thumbs-up from the Monterey Bay Aquarium Seafood Watch, which notes that "[mussel] aquaculture operations often benefit the surrounding marine habitat."

Mussels are also very, very easy to cook, which makes them a real treat for busy days. I like to cook them the day that I bring them home,2 if possible, but another day or two in the fridge has never been a problem. Even Emily Weinstein agrees that they're about as simple as can possibly be. My preferred method is how Sharon and I used to enjoy them at the Hopleaf Bar in Chicago: in wheat beer with shallots, celery, thyme, and bay leaf. Theirs also comes with a basket of heavenly frites and aioli - sometimes I'll make potatoes, but I'm too lazy for frites - but that's just icing on top.

Mussels

Also good if you've got some: a fine Breton or Norman dry cider. Traditional? No. But never not delicious.

* * * * *

1Okay, I've never actually tried shucking oysters before, but my access to high-quality ones is extremely limited, anyhow. I'm perfectly happy leaving the shucking to the professionals, and only having them as a very occasional treat.

2Ideally Wednesday, since the trash goes out that night.

Yogurt.

Lewisburg.

Harold McGee makes his own yogurt. Now, so do I.

The process is so wonderfully simple that it doesn't even merit a recipe sidebar:
  • Heat milk until it reaches 180° to 190°F. I picked up a gallon of whole milk, and ladled out half for ricotta when it hit the 160°F mark.

  • Cool to 115° to 120°F. Mix in two tablespoons of live yogurt per quart.

  • Keep warm for the next four hours, or until it's set and appropriately tangy. I poured the cultured milk into - of course - old yogurt containers, wrapped them in kitchen towels, and set them inside an insulated cooler.1
Then it's either eat or refrigerate. I can't imagine how this might get any easier. (Or cheaper.)

* * * * *

1It's insurance against accidental dog collisions as much as anything.

07 April 2009

Spring dandelions.

Lewisburg.

Growing up, I used to think of dandelions as weeds. As far as my parents - and just about everyone else in the vast suburban sprawl - are concerned, they're plant pests that need to be dealt with. Often via a mysterious granular substance spread across the lawn every spring.

Now I think of dandelions as food. They're edible. Delicious. And both free and freely available from my untreated lawn and garden.

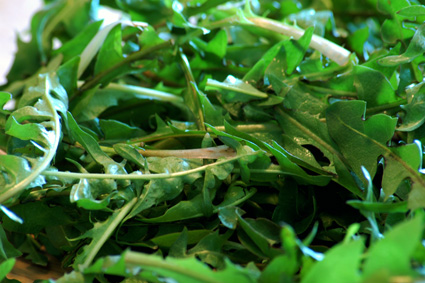
dandelion greens

Right now is prime season for tender dandelion1 greens, though the rapidly greening grass outside makes it somewhat more difficult to spot the bursts of little sawtooth leaves all around. Even so, it only takes ten or fifteen minutes of wandering about to fill the salad spinner, hardly making a dent in the total harvest out there. Those that I miss will go on to flower - I enjoy eating the flowers, too - and then there's always the opportunity to dig and roast the roots for making chicory "coffee".2

The leaves are just a tad bitter these days. Not so bitter that I can't enjoy eating some raw, but a salad of them exclusively is toeing the line. Ruth, who gave me some hop rhizomes, likes that edge of bitterness tamed with a classic bacon dressing, though she admitted she's having difficulties finding a suitable replacement for her vegetarian husband. I have the same trouble: Sharon doesn't go for bacon. Also, she's less enthused by the leafy bitterness than I am.

Instead, I took an approach more like Mark Bittman mentioned a few weeks back. His take was a Ligurian dish mixing dandelion (or other) greens with mashed potatoes, which do indeed look good. Except that we're all out of mashing potatoes - and only have about one meal's worth of fingerlings left, anyhow.

So: tortelloni.3

The key is to blanch the greens first. A minute in plenty of boiling, salted water completely eliminates any trace of bitterness, leaving sweet, wilted leaves that taste unmistakably of dandelion. Sure, a little bit like spinach - in the same way that all greens "taste like spinach" or all mild meats "taste like chicken" - but different and wonderful for it. Out of the boiling water, into cold water, and then drained and squeezed of excess moisture, they're ready to go.

I chopped them coarsely, mixed in about half as much ricotta, and added a few ground walnuts that were left over from a batch of walnut brandy truffles two weeks ago. Just salt and black pepper for seasoning. The ricotta held it all together and gave the filling a bit of creaminess, but nothing masked the dandelion flavor (or color).

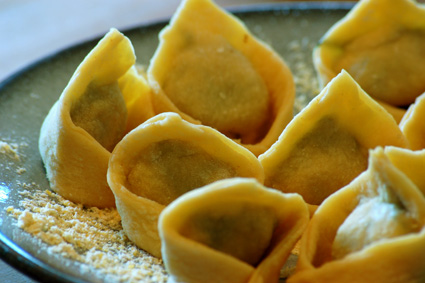
Wrapped in a bit of egg pasta dough, they've got a rustic sort of prettiness:

dandelion tortelloni

Since I wasn't sure how Sharon would react - turns out she loved 'em - I didn't build dinner entirely around them. Instead, I cooked them in a lightly seasoned duck stock4, and served them with their broth. Topped with some grated Parmigiano and some finely minced wild onion greens.

Also from the backyard. Also a fine edible plant I'd grown up thinking of as a noxious weed.

* * * * *

1I'm sure that I've picked plenty of chicory leaves, too. They're similar in appearance, and pretty much interchangeable as far as flavor goes.

2Haven't done that yet, but I'm looking forward to trying it.

3Tortellini, the really little ones, seem like far too much effort for a more-pasta/less-filling alternative.

4Duck bones being in the handiest stock-makings bag in the freezer, of course, but it seemed a good enough idea that I decided to cook up a pair of duck breasts I found in there, too.

31 March 2009

Shiro miso.

Lewisburg.

Miso might very well be the most unusual thing I have ever made, which is no small feat when the other contenders include kimchi and sauerkraut, olives, and, of course, head cheese. Fortunately, I'm thrilled with the results, both because it tastes great and doesn't appear to be poisoning me.1

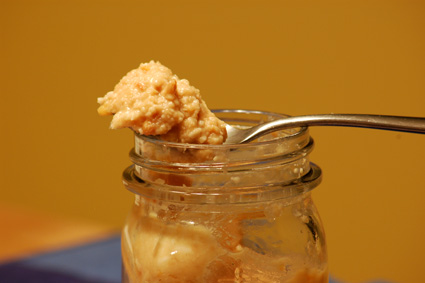
Shiro miso

Making miso - and shoyu, which I'll be starting up soon - is a multi-stage process.2 Also of concern3 for the novice miso-maker: unless you're Japanese, odds are you're no connoisseur of miso, and thus the line separating good from bad is rather fuzzy; the entire process takes weeks, months, or even a year before you have a final product; (warm) temperature control is especially important; and the fermentation relies on a whole host of different types of microorganisms - molds, yeasts, bacteria - so it's not as predictable as, say, brewing beer. Plus, you need to have some miso before you can make miso.

I think of it as a helical process. It circles about to where it began, but it's also taken a step forward. Like a sourdough starter, each new batch contains some (ever smaller) fraction of the original.

Let's say you want to make miso at home. Here's a brief rundown on the process.

Miso starts with a mold and rice culture called koji. Steam white short-grain rice until it's thoroughly cooked. Inoculate with Aspergillus oryzae - which you can order in packets of dry spores - a mold that breaks down the starches and other compounds in rice and soybeans. Keep it warm - 85°F - for 48 hours.4

If all goes well, you've got koji, which looks like rice dusted in flour. It smells good, mushroomy and yeasty, and just a bit sweet. The individual grains or rice are intact, but are brittle, and you can see the white mold all the way through to the center.

The next step varies slightly, depending on what sort of miso you're making. White shiro miso ferments quickly - a few weeks, rather than months - and was the first batch by default. It calls for cooked soybeans, salt, and a bit of seed miso. The soybean cooking is another time sink, because it takes in the neghborhood of four hours5 to boil soybeans until soft.

With prepared koji and cooked soybeans, it's a simple matter of mixing the two with a little of the soybean cooking water, some salt, and your seed miso. That last ingredient is super-important, because that little tablespoon of unpasteurized miso contains the wide array of microorganisms that will help turn your moldy rice and beans into richly flavored miso. As the whole mixture ages, the aroma changes and intensifies, until finally it's ready to be used. In theory, it should remain at 77°F during that time, but that's not a target temperature I can provide at home; mine fermented longer, at a lower temperature, which I've no doubt influenced the distinct aroma it has. It may be shiro miso, but it smells and tastes distinctly different from the shiro miso I'd used to seed it in the first place.

Most misos are salty, and between that and the long fermentation, they're relatively safe stored unrefrigerated, or so I hear, but they'll last indefinitely if kept cool. Shiro miso, though, won't last outside the fridge, so I now have about a quart and a half - minus what we've eaten so far - ready for enjoyment anytime.

I'm still looking for ideas on how best to use it. Miso soup is good, of course, and I rather enjoy having it for breakfast from time to time. (I just make a mug of it.) Mixing it in with ground peanuts, sesame seeds, and soy sauce makes a delicious dressing for vegetables like broccoli or green beans. Dark misos are excellent with meats - especially as a pre-grilling rub - but I don't see the shiro miso taking on that role. I'm thinking about using it as a filling for some northern Chinese-style steamed buns, just to see how it goes.

* * * * *

1Always a bonus.

2Red flag.

3More red flags.

4Unless you happen to have an incubator handy - which I don't - it's a job that calls for some serious attention. A cooler, some towels, and a large pot of warm water - regularly replaced and adjusted - did the trick, but it was immensely distracting.

5Or half an hour if you've got a pressure cooker. Which I don't.