31 March 2009

Shiro miso.

Lewisburg.

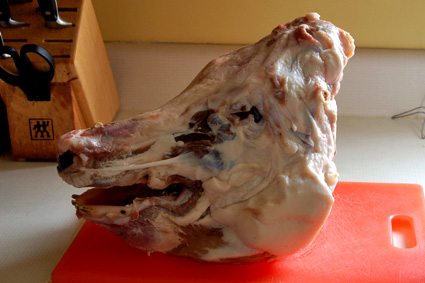
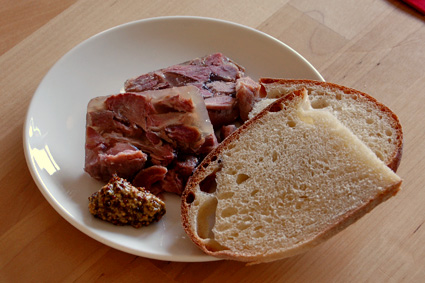
Miso might very well be the most unusual thing I have ever made, which is no small feat when the other contenders include kimchi and sauerkraut, olives, and, of course, head cheese. Fortunately, I'm thrilled with the results, both because it tastes great and doesn't appear to be poisoning me.1

Shiro miso

Making miso - and shoyu, which I'll be starting up soon - is a multi-stage process.2 Also of concern3 for the novice miso-maker: unless you're Japanese, odds are you're no connoisseur of miso, and thus the line separating good from bad is rather fuzzy; the entire process takes weeks, months, or even a year before you have a final product; (warm) temperature control is especially important; and the fermentation relies on a whole host of different types of microorganisms - molds, yeasts, bacteria - so it's not as predictable as, say, brewing beer. Plus, you need to have some miso before you can make miso.

I think of it as a helical process. It circles about to where it began, but it's also taken a step forward. Like a sourdough starter, each new batch contains some (ever smaller) fraction of the original.

Let's say you want to make miso at home. Here's a brief rundown on the process.

Miso starts with a mold and rice culture called koji. Steam white short-grain rice until it's thoroughly cooked. Inoculate with Aspergillus oryzae - which you can order in packets of dry spores - a mold that breaks down the starches and other compounds in rice and soybeans. Keep it warm - 85°F - for 48 hours.4

If all goes well, you've got koji, which looks like rice dusted in flour. It smells good, mushroomy and yeasty, and just a bit sweet. The individual grains or rice are intact, but are brittle, and you can see the white mold all the way through to the center.

The next step varies slightly, depending on what sort of miso you're making. White shiro miso ferments quickly - a few weeks, rather than months - and was the first batch by default. It calls for cooked soybeans, salt, and a bit of seed miso. The soybean cooking is another time sink, because it takes in the neghborhood of four hours5 to boil soybeans until soft.

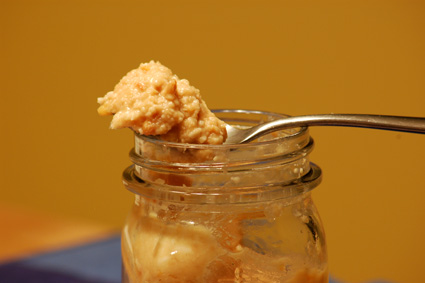
With prepared koji and cooked soybeans, it's a simple matter of mixing the two with a little of the soybean cooking water, some salt, and your seed miso. That last ingredient is super-important, because that little tablespoon of unpasteurized miso contains the wide array of microorganisms that will help turn your moldy rice and beans into richly flavored miso. As the whole mixture ages, the aroma changes and intensifies, until finally it's ready to be used. In theory, it should remain at 77°F during that time, but that's not a target temperature I can provide at home; mine fermented longer, at a lower temperature, which I've no doubt influenced the distinct aroma it has. It may be shiro miso, but it smells and tastes distinctly different from the shiro miso I'd used to seed it in the first place.

Most misos are salty, and between that and the long fermentation, they're relatively safe stored unrefrigerated, or so I hear, but they'll last indefinitely if kept cool. Shiro miso, though, won't last outside the fridge, so I now have about a quart and a half - minus what we've eaten so far - ready for enjoyment anytime.

I'm still looking for ideas on how best to use it. Miso soup is good, of course, and I rather enjoy having it for breakfast from time to time. (I just make a mug of it.) Mixing it in with ground peanuts, sesame seeds, and soy sauce makes a delicious dressing for vegetables like broccoli or green beans. Dark misos are excellent with meats - especially as a pre-grilling rub - but I don't see the shiro miso taking on that role. I'm thinking about using it as a filling for some northern Chinese-style steamed buns, just to see how it goes.

* * * * *

1Always a bonus.

2Red flag.

3More red flags.

4Unless you happen to have an incubator handy - which I don't - it's a job that calls for some serious attention. A cooler, some towels, and a large pot of warm water - regularly replaced and adjusted - did the trick, but it was immensely distracting.

5Or half an hour if you've got a pressure cooker. Which I don't.

27 March 2009

The 2009 season begins.

Lewisburg.

The planting has begun. Yesterday, a couple of these went in the ground:

Hop rhizomes

Hop rhizomes. With little buds all ready to go. Ruth, Tom's wife, the gardener and hops caretaker, offered me some when she divided hers, and they went more or less directly from her yard into mine. My guess is that they spent fewer than four hours out of the ground, which I'm hoping will result in vigorous growth this year.

By next year, I'm planning to have a wire support system that spans the deck - they're planted along one side - to enable the hops to become an annual green roof for outdoor dining. Fingers crossed.

For more immediate gratification, this morning I planted three flats' worth of seeds for May transplanting: one of tomatoes, peppers and herbs; two of various flowers that Sharon selected. The 2009 gardening season is officially under way.

21 March 2009

Seven kinds of olives!

Lewisburg.

It's the six-month mark today, so it was high time to sample olives. I ate one from each of my seven batches, and they're all edible. (I'm avoiding the handful of black/moldy/etc. ones, though, so they don't count.) Some are distinct favorites: citrus, garlic, and bay leaf flavors really match well. Cinnamon? Not so much. Also, I found some more bitter than others, and all of them firmer than the ones I'm used to from the store. Plus: the olive flavor is wonderfully intense. These are not olives for the faint of heart.

From what I understand, they'll keep for at least another six months in their brine at room temperature. Refrigerated, even longer. If the flavor starts getting strong in time, refrigeration'll slow 'em down. But will they last that long?

Also: the citrus-intense variety (lemon, lime, orange, celery) is pretty damn good in a martini. More details once I've had time to give them all some serious attention.

17 March 2009

Fromage de Tête.

Lewisburg.

It's difficult to state it better than the late English food writer, Jane Grigson:
"Anyone can grill a steak or chop; the cheaper cuts require careful and sophisticated cooking. This does not mean that the methods are difficult or tortuous, but they do require judgement and care over detail. Lack of proper care ... and insensitivity to flavour make many manufactured meat dishes in England uneatable. This commercial debasement ... has misled people into feeling that only the expensive parts of a pig are worth eating."
It works as a fairly general statement, but Grigson is referring specifically to dishes such as fromage de tête. Brawn, in her native England. Head cheese here in the States.

The last - and in fact only - time that I can recall having head cheese was at a tiny Alsatian restaurant in Strasbourg. I asked the owner to bring me the sorts of food I wouldn't find outside of Alsace, and my appetizer was a well-made head cheese. From a pig's head, he told me; not from a calf's head, like you'd find more commonly elsewhere.

It wasn't until recently that I had everything I needed1 to make my own. Important things on that list: a very large pot; a meat saw2; and this:

Pig head

One pig's head. In this case, skinned, since it seems nigh impossible to find someone who'll sell a hog with skin on.3 A shame, since the skin's so tasty, but what can you do? I got the head for pretty much free; the farmers said that I was welcome to have as many as I like in the future. The butcher just throws them out, and wouldn't mind in the least.

It doesn't look so terrifying in this picture, though getting up close and personal - with the saw, in particular - made the source of my upcoming meals pretty damn clear. (Like when you find that jamming a thumb into an eye socket gives a better grip.) What made it look something like a horror film prop was when I'd sawn the nose off, exposing some truly fascinating shapes of cavities within the skull. That and big ol' pig teeth. No, I didn't take any pictures.

Brief aside: sawing through a skull is serious work. Cutting turkey carcasses to fit into gallon-size freezer bags? Easy. Trying to hold meat and bone stable enough while ensuring my fingers stay intact? It's enough to make me dream of owning a band saw.

Once that's done, the cooking process couldn't be much simpler. Both Ruhlman and Polcyn's Charcuterie and Grigson's Charcuterie and French Pork Cookery recommend much the same process; I followed the former, because they're more precise - and use easier-to-measure ingredients, like pink salt instead of saltpeter - and I don't have to worry about British-American conversions. In brief, making head cheese goes like this:
  1. Brine a pig's head and trotters, or, in my case, a fresh hock.4 Pink salt's optional, though the pink color and cured flavor are nice. Got a cured tongue? Add it to the cooking pot, but not the brine.

  2. Simmer for hours in a large pot with aromatics (garlic, leek, onion), spices (quatre épices - white pepper, cloves, nutmeg, ginger; peppercorns), herbs (parsley, bay, thyme), and a good bit of white wine, plus plenty of water to cover. It's done when the jaw detaches easily.

  3. Remove the meat from the cooking liquid, and strain it. Reduce the liquid until it's gelatin-rich enough to set into a firm gel when chilled. Dice the cooked meats,5 and place in a mold with enough aspic to cover. Chill overnight before slicing.
There are some variations, of course. Grigson recommends coating the firmed fromage with toasted breadcrumbs, or lining the mold with slices of hard-cooked egg. Others might add brightly-colored vegetables, such as carrots, sliced and trimmed into flower and leaf shapes. Mine's nothing fancy:

Head cheese

But with some fresh bread and mustard, it's excellent stuff. A green salad and vinaigrette wouldn't hurt, either.

As for the name: according to Alan Davidson's The Oxford Companion to Food, it "is usually moulded in a cylindrical shape, like a cheese". I'd really hoped for a more colorful - even potentially bogus - story for it, but I guess that'll have to do.

* * * * *

1Including the time and inclination.

2To help, uh, fit the head into the pot. Even the 4-gallon stockpot that I have couldn't handle the whole thing. I could have used the 10-gallon pot I use for brewing beer, except that it's difficult to clean, especially when coated with cooked-on protein-y junk.

3As I understand it, scraping the hide clean is more difficult and time-consuming than simply skinning the carcass.

4You can't get real trotters - feet - unless the pig's been scraped clean. They have less meat and more connective tissue than hocks, which is of some benefit here, but you work with what you've got. In my case, half a dozen hocks, though only one went into this batch. Even so, it may have furnished as much meat as the entire head did.

5Finding all of the meaty bits around the head is kind of fun. Who knew there was a (relatively) good-sized muscle running up behind the eye, protected by an arch of skull? Plus, you can see where all of the nerves - eyes, nose, etc. - disappear into little openings to reach the brain. Sadly, I couldn't figure out how to extract the brain without making a serious mess, so I couldn't cook that up. Next time, maybe? (Grigson heartily recommends it.)