23 January 2009

I'm just crackers for...

Lewisburg.

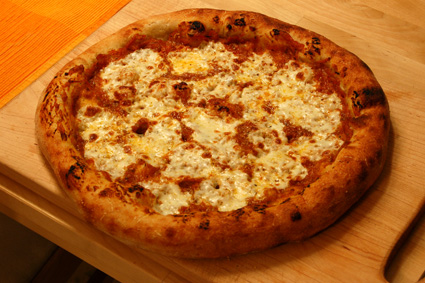
Do these count as bread?

Crackers

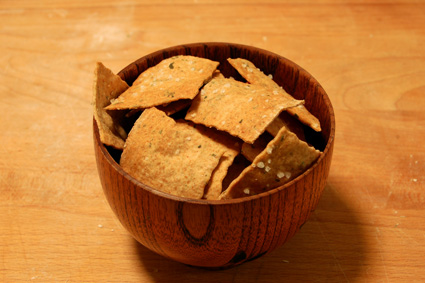
In addition to the usual breadmaking around here, I've been making crackers. Lots and lots of crackers. I'm trying to keep a jar of crackers full at (nearly) all times, because they're a real treat to snack on occasionally. The ones pictured above are whole wheat with celery, which we devoured with a vegetable soup; the next set, on the counter now, are made with rye flour and poppy seeds. Other versions have been topped with a variety of seeds - fennel, caraway, cumin, etc. - and flavored with spices like smoked paprika or sweetened with a little sugar. They're extremely easy, and flexible to boot.

I'd made less-than-special crackers every great once in a while, but mostly before I really got into baking bread. Before I started paying close attention. Besides, in Madison, I could just pick up Potter's Crackers at the Willy St. Coop. Why mess with success?

Now I no longer have that luxury. And then I spotted this article in the New York Times. More specifically, I watched the little video that accompanies it, which made the whole process look easy. Too, too easy. So I had to try again, only with a little more precision.1

Important note: crackers are easy. I've adjusted the Times recipe to make things more consistent, but a little care and attention will definitely turn out fine crackers every time.

Here's the general process, which is as close to a recipe as I follow:
  1. In a small bowl, mix together 200g of flour. I tend to use at least 50-75% bread flour, with something more flavorful - whole wheat, barley, rye, etc. - to top it off, but anything with some gluten in it should work on its own. I'm certain that 100% whole wheat will turn out well; all-barley and all-spelt should be okay, too. Not sure about cornmeal yet, but it might be the next experiment.

    For lightly sweet crackers, try adding 30g of sugar. The dough's more difficult to work, as most sweet breads are, but they're especially crisp when done. Dusting the tops with sugar also makes for a fantastic gloss.

  2. Include salt, ground spices, and herbs in the bowl. Poppy seeds work, too. I use about 6g of salt (a scant half tablespoon of kosher salt), and plan to use more for the top. Mix it all together well.

  3. Stir in 120g water (60%). Or so. It just has to be a kneadable dough. Stir to bring it together, then knead smooth-ish. There's no need to overdo it.

  4. For consistency's sake, I roll mine out with a pasta machine. (Number 6 on my Atlas, which is a slightly thick and chewy linguine size.) That way, I can cover two half-sheet pans2 without crowding. If you're rolling by hand, just beware of thick spots, especially around the edges.

  5. Brush the tops of the sheets of dough with water, the sprinkle with salt, seeds, etc. Score into whatever shapes suit - a pizza cutter or pastry wheel is handy here - and slide into the oven.

  6. Bake at 350°F for 20-25 minutes. I usually switch and rotate the trays after 10 and 20 minutes to bake them evenly. When they're brown and crispy, they're done. Move them to a rack to cool - which only takes a few minutes - and break them along the score marks. In an airtight container, they'll last... until they're all eaten, I guess. It doesn't take very long around here.
* * * * *

1In short: I'm using fewer and fewer volume measurements in baking, instead swapping them out for weight, which is far more reliable.

2The usual size in a home kitchen. Full sheet pans won't fit in my oven.

15 January 2009

Mmm. Stripey tomatoes.

Lewisburg.

Let's talk tomatoes.

There are a small handful of vegetables that the average American garden includes. Sweet corn's up there, as is the zucchini. Green beans often make a showing, and snap peas seem pretty common. But nothing rivals the tomato for popularity, in my experience. A warm, vine-ripened tomato is a luxury that even the poor saps buying grocery store tomatoes1 this time of year can appreciate. I even remember an excellent "News from Lake Wobegon" bit from years back that was entirely devoted to the effort and pleasure that goes into growing the perfect tomato.

That said, I don't aim for perfection. I aim for delicious, delicious variety. This year, I'm planning to grow nine different varieties of tomato. I'd plan on more, but space constraints - both in garden area and stomach capacity, even considering the canning and drying options - limit me to somewhere in the range of twenty plants. Which is still a lot, of course.

The majority of our tomatoes come from the Seed Savers Exchange, a non-profit group devoted to preserving heirloom seeds. If you're a member, you have access to an alarming variety of plants, but even we peons can find a phenomenal variety of interesting things in the annual catalog. Especially when it comes to peppers, melons, squash, and tomatoes.

Oh, the tomatoes. SSE offers 72 different varieties in their catalog, and they run the full range of possibility in terms of color, size, shape, and flavor. Reds and pinks, yellows and greens, oranges and browns and blacks; some with stripes and some with peach-like fuzz. The Brandywine (Sudduth's Strain) will produce fruits of up to 2 lb. each, while the Gold Rush Currants are a mere quarter-inch in diameter. The choices are so interesting that it's tough to choose.

I've ended up with nine types of tomatoes for 2009; eight come from SSE, plus the Sun Gold hybrid from Johnny's Selected Seeds. It's such a fine little tomato that it's tempting to grow it alone, just a field of bright, sweet, orange-colored fruits ready for eating out of hand. But we need variety. So, after a series of little red dots beside everything that looks good2, it's time to narrow it down.

Sometimes it's easiest to make up a few semi-arbitrary rules to simplify the process. For example: no beefsteak varieties. Sure, they're good, but we're less likely to use them. Another: no Sun Gold-like varieties, since we've already got that covered. And: a mix of colors is essential. Finally: what worked best last year?

What does that leave us with? More than enough, still. Admittedly, flipping back through the catalog makes me want to second-guess myself; maybe I should have picked the Plum Lemon or the Nyagous. But the seeds are already on their way, so I suppose these are enough:
  1. Black Plum: Oval 2" fruits ripen from deep mahogany to black-brown, better color than other blacks. Some prefer this variety for spaghetti sauce because of the nice rich color. Indeterminate, 80 days from transplant.

    We love these little tomatoes, and have grown them with success a number of times. In addition to having good flavor and a really interesting color, they've got a perfect little size that lets them ripen well even in an off year (like 2008). They're also spectacular when dried, because the meaty flesh holds them together into perfect slices.

  2. Federle: Beautiful, blemish-free 6-7" long paste tomato, rich full flavor unlike most other banana pepper-shaped tomatoes. Productive plants. Very few seeds, excellent for processing, especially good for salsa. Indeterminate, 85 days from transplant.

    These are going to be an experiment. We didn't have great luck with the Amish Paste tomatoes last year, so a lot of these are probably destined for canning or drying. If we get enough of them, then we'll probably start canning our own jars of salsa again this year - assuming the peppers have a good year, too.

  3. Green Zebra: Green 1½ - 2½" fruits with various shades of yellow to yellowish-green stripes, sweet zingy flavor. Very productive plants, sure to be a best seller at market. Introduced in 1985 by Tater Mater Seeds. Indeterminate, 75-80 days from transplant.

    Hands-down, my favorite tomato. Juicy, uniquely spicy in flavor, and really striking when they ripen to green and yellow tiger stripes. They're perfect for the home garden, because they're almost impossible to transport when fully ripe; they're so tender that it's all you can do to get them inside the house intact.3

  4. Jaune Flamme: Beautiful apricotshaped heirloom from France. Great for drying, retains deep orange color. Excellent bitey flavor. Very productive, fruits borne in clusters and weigh 2-3 ounces, about the size of a large apricot. Indeterminate, 70-80 days from transplant.

    One of Sharon's favorites. 2008 wasn't a good year for them, but they have such a great flavor that I'm trying again. We'll have to see how they compare with the...

  5. Moonglow: Medium-sized bright orange fruits. Solid orange meat, few seeds and wonderful flavor. One of our favorites since we first grew it in 1996. Indeterminate, 80 days from transplant.

    Will these be as good or better than the Jaune Flamme tomatoes? Who knows? At least we ought to have plenty of orange tomatoes this year.

  6. Speckled Roman: Developed by SSE member John Swenson as a result of a stabilized cross of Antique Roman and Banana Legs. Gorgeous 3" wide by 5" long fruits with jagged orange and yellow stripes. Meaty, great tomato taste, ideal for processing. Very productive, few seeds. Still throws an occasional yellow striped fruit. Indeterminate, 85 days from transplant.

    We've picked these up at farmers' markets before, and they're really cool-looking. They taste pretty good, too. I'm thinking of them as a complement to the Federle tomatoes for processing, in addition to looking good on a plate of sliced tomatoes.

  7. Stupice: One of the four Czechoslovakian tomato varieties sent to the U.S. by Milan Sodomka. Potato-leaf 4' plants loaded with 2½" by 2" diameter fruits borne in clusters. Extremely early, great flavor. Heavy yields all season. Produces well in northern climates. Indeterminate, 55-70 days from transplant.

    Here's our workhorse tomato. Sharon remembers us growing them - with good results - in Madison, though I can't quite recall. I do remember seeing them for sale at the market, and figure it's worth a shot. If nothing else, they're early tomatoes - as early as 55 days, compared to the 70 or 80 days more common for similarly-sized fruits.

  8. Wapsipinicon Peach: Heavy producer of 2" peach-shaped fuzzy yellow fruits. Sweet excellent flavor. Our favorite “peach” tomato, from Dennis Schlicht, named after the Wapsipinicon River in northeast Iowa. Winner of SSE’s 2006 Heirloom Tomato Tasting. Indeterminate, 80 days from transplant.

    Now this is one delicious and productive tomato. Just all-around excellent, and we're going to continue to grow this variety for as long as we can get the seed. Also interesting: the skin is slightly fuzzy, and the flesh blushes pink in spots when ripe, making these alarmingly peach-like in appearance.

  9. Sun Gold: Intense fruity flavor. Exceptionally sweet, bright tangerine-orange cherry tomatoes leave customers begging for more. Vigorous plants start yielding early and bear right through the season. Tendency to split precludes shipping, making these an exclusively fresh-market treat. The taste can’t be beat. Indeterminate.

    Yup, these are a pretty phenomenal tomato. Perfectly delicious eaten out of hand, or just barely cooked, warmed through and softened ever so slightly. If left whole and slow-roasted, they're the most amazing tomato-flavored candy.
What'll work this year, and what won't? Will twenty plants be far too many this year? What varieties will I be salivating over for 2010? Hard to say, but I'm excited to find out.

* * * * *

1Why? Seriously? They have the taste and texture of cardboard. I could try to explain it by assuming it's part of some lizard-brain habit, except that my lizard-brain is occupied solely with things that I like, including sleeping in, sex, cocktails that taste of alcohol, and guilty-pleasure foods. Not necessarily in that order, though extra sleep is so much nicer when the dog gets you up in the pre-dawn hours every single day.

2Relatively speaking. Honestly, there probably isn't a single one in the catalog that I wouldn't be happy to be growing, so there's a distinct pressure to be selective.

3Exaggeration? Sure. But only slightly.

14 January 2009

Pizza.

Lewisburg.

We had pizza for dinner last night. It's been an evolutionary process to get here:

Pizza

Let me note that getting a pizzeria-like crust from a home oven is far more difficult than you'd expect, for one reason: professional pizza ovens (and wood-fired brick ovens) hang out in the neighborhood of 700° to 800°F. Sometimes up near 900°F. Mine only threatens to get near that range during the self-clean cycle, during which the door latch safety mechanism makes it really tough to get the pizzas in and out. So even cranked up to full blast, a home oven can't get a traditional pizza crust, well, crusty.

At least not beneath the sauce, cheese, and other various toppings. It'll still taste good, of course, but it's just not quite right. It's frustrating.

I stumbled across a key bit of information on Baking Bites, in a post for the Perfect Pizza Crust. Higher-protein flours absorb more water, which helps keep the crust from drying out in the professional oven... but results in a soft crust at home. Switching to all-purpose flour is an improvement, but still not quite perfect. The Baking Bites solution - from a recipe in Cook's Illustrated - uses a combination of all-purpose and cake flours to achieve crispiness.

Problem: I don't like cake flour. Yes, I do have some in the pantry, but I avoid it whenever I can. It's undergone some serious bleaching and other treatments, which I'd just as soon not rely on for situations that don't demand it. I'll even make cakes with all-purpose flour, which still makes for a delicious dessert, though with a slightly denser and drier texture.

Solution: pastry flour. It's low-protein flour, with great flavor if you've got a whole wheat version, like most organic brands.

In brief, here's how I'm making pizzas these days:
  1. Make the dough for the crust with a mix of all-purpose and pastry flours. I like 225g total for a 12-inch pizza, and, though it may need some tweaking, I think 175g all-purpose and 50g pastry flour works well. Add 5g salt, an appropriate amount of yeast1, and 157g water (70% hydration). Mix together, knead briefly, and set aside to rise.

  2. Make the sauce, with whatever tastes good. Cook it down until the tomatoes have completely lost their structure and a lot of moisture. Puree and set aside.

  3. For toppings, I keep it very simple. A small amount of thinly sliced or shredded cheese when we're not feeding vegans. Perhaps some mushrooms sauteed until crispy, or a few caramelized onions. Fresh herbs, in season, can wait until the pizza comes out of the oven.

  4. Stretch the dough into a 12-inch round. If necessary, set it down during the stretching process to let the gluten relax. You'll want it thin, but avoid tearing it; fold over holes and pinch together to patch them. I like to grab about an inch in from the edge to create a rim of crust and pull apart gently while rotating the dough. It's not nearly as impressive as spinning and tossing, but a lot safer. I also think it's even easier than laying the dough flat and stretching, because you're letting gravity do a lot of the work.

  5. When the oven's as hot as it'll get - 550°F here, with the pizza stone well preheated2 - lay the crust on a peel dusted with cornmeal. Make sure it's not sticking. Brush on a light layer of olive oil, then spread with just enough sauce to almost cover. Top with cheese or whatever, and slide into the oven. Bake until it's brown and crispy. I find that seven to eight minutes works. Allow to cool on a rack for a few minutes, which'll help keep the underside from getting soggy after all that work.
Years of fighting with pizzas and home ovens, and it's that simple. The most difficult part, I think, is stepping back enough to treat the entire process with a light touch. Don't work the dough too much; a minimum of effort gives maximum rewards. Resist the temptation to embellish with too many toppings. A good crust just can't handle it, and gets lost underneath.

Enjoy the fact that it's good, simple food. But no less impressive for it.

EDIT: Mis-typed the quantity of salt for the pizza dough. It's a lot less over-salted now.

* * * * *

1Half a teaspoon works for a one- or two- hour rise; scale it back to a quarter or an eighth for overnight, depending on how long it'll go. Or use the fridge to retard the rising. I pretty much never do, though it's mostly a function of lack of space.

2The oven beeps (or whatever) to say it's preheated? It's lying. They all do. Give it at least another half an hour, especially to ensure that the pizza stone is up to temperature, too.

Garden planning: the "good parts" version.

Lewisburg.

'Tis the season for very little gardening, but lots of planning. The first package of seeds (along with some other useful odds and ends) is due to arrive from Johnny's today, and the bulk of the rest from Seed Savers not long after. This step, of course, comes after the spreadsheet-based mania that I use as the main planning process. Steve, you asked for it; here's how I'm planning the 2009 gardening season.

I'm amazed that I find it as interesting as I do. After all, I haven't often (ever?) though of playing with spreadsheets to be especially fun. At the moment, I'm wrestling with how I can put the gist of it up here without making my eyes glaze over with boredom, let alone anyone else's. At this point, I'm going to take a cue from William Goldman1 and just run with the "good parts" version. In brief, it goes something like this:

1) The days grow short in November and December, and the ground starts freezing over. With any luck, I take this as a sign to let the garden rest, and I've had the foresight to harvest everything that's harvestable.2 Exciting discovery from 2008: the Brussels sprouts can nearly freeze solid and still cook up beautifully. Also: when the planters on the deck freeze solid, the cold-hardy plants in them will wilt. Bring them inside, though, and they come back to life.

2) In mid-December, the new catalogs arrive. They're all possibility and no effort; with pretty pictures and enticing descriptions, they make the argument that there isn't a bad choice among them. Examples that I've selected for my garden:
  • Listada de Gandia (Eggplant): Beautiful purple striped eggplant. After selecting for over 5 years, this is the best strain out of 10 for consistent deep color and earliness. We can say with certainty that this is the best strain available on the market. Reliable, heavy yields of excellent quality, 6-8" thin skinned fruits.

  • Noir des Carmes (Melon): One of the easiest to grow and most luxurious of all melons. Extremely dark green skin, almost black when immature, ripening to mostly orange mottled with green. Sweet, aromatic, orange flesh. Very productive. Sure to be a new family favorite.

  • Hon Tsai Tai (Brassica rapa): Purple flower stems and buds. A Chinese specialty. The young plants soon branch and produce quantities of long, pencil-thin, red-purple, budded flower stems. Pleasing, mild mustard taste for use raw in salads or lightly cooked in stir-fries or soups. For multiple harvesting of tender stems and leaves. Can be spring sown, but yields best when sown June through October for harvest from midsummer through winter (in mild areas).

  • Sun Gold (Tomato): Intense fruity flavor. Exceptionally sweet, bright tangerine-orange cherry tomatoes leave customers begging for more. Vigorous plants start yielding early and bear right through the season. Tendency to split precludes shipping, making these an exclusively fresh-market treat. The taste can’t be beat. Indeterminate.
And so on. I spend a few weeks looking through everything, marking the interesting ones with a red pen. The Listada de Gandia and Sun Golds were successes in 2008, but the others are new experiments. This year brings the new experience of being able to check off vegetables that we're thrilled to be able to grow (and eat) again.

3) Inevitably, there are far too many little red dots. This year, I've limited myself to about forty-five different types of vegetables and herbs; the total number of varieties is a little over one hundred. (Nine types of tomatoes and fifteen kinds of peppers'll do that.)

Figuring out what to grow becomes a back-and-forth process between individual garden bed layouts and the catalogs. There are thirteen beds - fourteen including the planters on the deck3 - in a particular rotation schedule to (in theory) minimize pest and fertility problems. Each is approximately nine by twenty-five feet, separated by bands of untilled lawn and smaller patches with flowers and herbs. Most of these large plots will be devoted to vegetables, except for a few with cover crops. I go through them, one by one, filling in the available space with the varieties that look most interesting, or that worked out last year, and set aside a few pockets for scattering flowers and herbs.

garden layout

This is the 2009 arrangement of garden beds. It's oddly-shaped because of the edge of the property and the various trees already growing around. The little two-letter markings are a shorthand for coordinating placement in spreadsheet columns; writing "br" instead of "brassicas" means I don't have to scroll left and right as often when typing the details in.

4) The next, deeply exciting step is to try to coordinate multiple plantings to make the most effective use of space. Also to avoid having one massive harvest of, say, lettuce, that we can't possibly eat and can't preserve for later. I'm not especially good at this, though I'm getting better. Fortunately, the garden's productive enough that it can easily feed two people with regular dinner guests for the bulk of the season.

It's also time to make sure that I have enough space at any given time to start seedlings. Since long-season crops are a little hard-pressed to produce in the window between frosts in Pennsylvania, the seeds need a head start beneath a row of fluorescent tubes for a few weeks. Without a greenhouse handy, I'm limited by the size of my table and number of fixtures. (It's plenty.) Any spare space will be used for flowers, so we can have some colorful blooms early in the season.

5) Final step: order seeds. After using the spreadsheet to figure out how many I need - length of row times seed spacing, plus extras for starting transplants; accounting for any seed I have saved from last year - I spend the better part of an afternoon clicking the "add 1 packet" button on the seed company websites.

In brief, that's it. Later I'll probably post something to highlight a few of the interesting varieties I'm trying out this year. After all, for the price of a cup or two of coffee, I can get enough heirloom tomato seeds to make pizza sauce regularly throughout the winter. Or a year's worth of basil for pesto. Or, if all goes well, more watermelon than I know what to do with.

* * * * *

1Author of The Princess Bride.

2This might change next winter, if I get around to constructing a few cold frames to extend the season.

3For both convenience and deer- and rabbit-proofing. Salad greens, baby carrots, radishes, turnips, peas, and plenty of herbs are all planned for the deck. So are a few small pepper plants that are both ornamental and edible.

05 January 2009

Walnut brandy.

Lewisburg.

I have a backyard full of edible things. Some of those I've planted, like the multitude of vegetables in the annual - and slowly expanding to year-round - garden.1 Then there are the existing fruit bushes and trees, like the blueberries and pears that were so productive that we weren't prepared for it all.

Then we have the apples and walnuts. The apple trees, it seems, have never been pruned2, which means we won't have a chance at harvesting anything halfway decent until I'm able to bring them back under control. And the walnuts? Well, I never did find any ripe ones. My hunch is that the squirrels managed to swipe them all well before I could.

It's okay, though. I have a backup plan: walnut brandy. In addition to making use of the nuts months before the squirrels are even paying attention, it handily solves the issue of preservation. Plus, it's potent mojo.

In short, the process goes like this: harvest unripe walnuts; steep in vodka or brandy with spices for several months; add sugar to take the edge off; drink when the weather's turned cold and damp. I have English walnuts handy, but I don't see any reason it wouldn't work with the black walnuts that grow like weeds around here. There's no doubt that the flavor will be different - black walnuts being especially strong-flavored - but probably worth the (minimal) effort.

The recipe comes from Elisabeth Luard's European Peasant Cookery, a real gem of a find from the library. I've tweaked it slightly, reducing the quantity of sugar3, but it worked so well that I fully intend to work up multiple batches next year.
Walnut Brandy (Broux de noix)
Makes 2 liters
Time: Start 6 months ahead

Ingredients
  • 10 fresh green walnuts
  • 2 liters eau de vie or vodka
  • 2 sticks of cinnamon
  • Zest of 2 lemons
  • Scrap of mace
  • 2 cloves
  • 500g sugar
Directions
  1. Pick the walnuts in early July, when tender enough to pierce with a needle. Cut them in half and remove the outer husks; wear gloves, as the flesh will stain fingers for days. Chop the nutmeats as finely as possible, using a food processor if possible.

  2. Place the walnut paste, cinnamon sticks, and alcohol in a large jar. Seal tightly and set in a warm place to infuse.

  3. At the beginning of September, strain the liquor through a cheesecloth and discard the walnuts and cinnamon. Return to the jar and add the lemon zest, mace, cloves, and sugar. Set aside to infuse for another month. Strain again, bottle, and set aside until late December. Serve in small glasses, preferably in front of a burning Yule log.
* * * * *

1I intend to post some significant chunks of the garden planning information this year, but I'm still hammering out the details. I hope to be ordering seeds very shortly.

2Our neighbors can pretty much confirm this.

3Maybe. There's a typo in the recipe, such that it calls for either 500g or 1kg of sugar, depending on where it's noted. I opted for the smaller amount, which is still undeniably sweet.