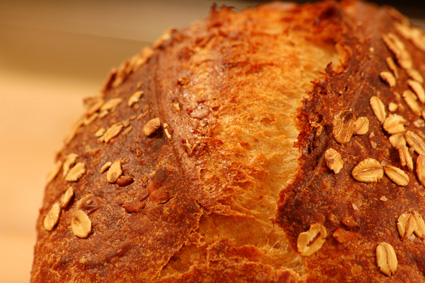
I've been on a bread-baking kick of late. The primary reason, I suppose, is that finding decent bread1 around here is nigh impossible. So it's either this:

Or nothing.
Funny thing about bread: it's very easy to make your own, but it's maddeningly difficult to master. It seems, in fact, that the more time spent attempting to master it, the more I realize the immense complexity and depth of the whole endeavor. Even choosing to restrict the ingredients to the basic four2 - flour, water, yeast, salt - leaves the budding baker with a wide range of options. Personal example: bread was one of the first things I taught myself to make, about ten years ago. I haven't struggled with anything else for near that length of time.3
What I have learned about breadmaking is as follows:
- Measuring by volume will drive you mad. Get a good scale and use it for everything. (Exceptions for small quantities, such as fractional teaspoons and tablespoons of yeast, salt, herbs, etc.) Varying the weight of the added liquid - as a percentage of the flour's weight - produces a wide range of results. Try 50% for bagels; 85% for an open texture full of irregular holes; 65-70% for everyday loaves. Corollary: Work in metric; it makes the arithmetic far less headache-inducing. Second corollary: Generally speaking, you'll want to learn the approximate weight of flour that best fits your chosen baking container(s). There's some flexibility here, influenced in part by the specific ingredients you choose, but it helps a) produce well-shaped loaves, and b) reduces the number of times you'll need mentally calculate 65% of 450g.
- Novice breadmakers use too much flour. Always.4 You'll almost have to be teetering across the dough/batter divide before kneading becomes impossible. Caveat: Kneading takes longer than you'd think to get the knack for. Fortunately, it's not as critical a step as most cookbooks seem to suggest.
- Bake at higher temperatures. 350°F may be essential for especially rich or sweet breads - brioche, cinnamon rolls - to prevent scorching, but it makes for an unimpressive crust on most loaves. I'm currently baking most breads in the 425° - 450°F range, though pizza crusts get as much fire5 as the oven'll give me.
- Don't use sugar. Unless you want the sweetness (sweet breads) or flavor (bagels and pretzels), of course. There's plenty of food for the yeast in the flour, and giving them refined sugars only reduces the fermented flavors in the finished bread. Some people seem surprised by this, which itself surprises me. After all, refined sugar's pretty new on the culinary scene; leavened bread's leaning to the ancient side.
- Less yeast, more time. Makes it taste better. Plus, the timing's more forgiving. The refrigerator can be a fine tool.
- Use enough salt. It improves both flavor and texture. I use a scant tablespoon - 15g or so - of kosher salt for 450g of flour, which suits me.
- For a lovely, shattery crust, an enclosable baking container works wonders. A cast-iron dutch oven (preheated, of course) is the best I've found, though I bake sandwich loaves with a pair of loaf pans. One sits upside-down atop the other, held in place with binder clips. A tent of aluminum foil, tightly crimped around the edges, works well, but you need to be careful to leave enough space for the oven spring.
- Make bread frequently. I don't often repeat the same precise recipe, but each time is a variation on a few different themes, and the experimentation makes for a fine teacher.
- Finally: those who don't bake bread are inevitably impressed with all but the most spectacular failures. (That would be the great majority of everyone you know.)
Walnut bread* * * * *
This loaf's becoming a favorite treat around here, fueling the need to buy walnuts in bulk. (The squirrels get every single nut off of the trees in the backyard.) It makes a fine loaf bread, though I made a wreath-like epi version for a holiday gift. Rich and tender, it's lovely stuff.
The following quantities suit my 9-¼" x 5-¼" loaf pan, which is how I'm most inclined to make it. To grind the walnuts, I give them a quick trip through the food processor. The result is fairly fine without becoming oily.
Ingredients:Directions:
- 600g bread flour
- 100g ground walnuts
- 20g salt
- 3/8 teaspoon yeast
- 420g water
- Mix together the dry ingredients in a large bowl. Stir in the water, and turn out onto a lightly floured board. Knead briefly, until it is all incorporated together. A shaggy dough is just fine. Shape into a ball and return to the bowl. Cover with plastic wrap and allow to rest 18-24 hours.
- Punch down the dough and shape into a loaf; allow to proof, covered, in a lightly greased loaf pan for at least an hour. Bake in a 425°F oven for about an hour; if possible, keep the loaf tightly covered for the first half hour. Allow to cool on a rack.
1As in "good enough", not "especially good" or "great".
2Which I'm certainly not doing.
3Even something like roasting a Thanksgiving turkey, that once-a-year-and-only-once process, is coming along at a better clip.
4Note: This will not happen if you adhere to two simple rules.
- Weigh your ingredients. Do not use volume measures.
- Use a minimum of flour on your board when kneading. Using a dough scraper helps, particularly for doughs with 70% hydration and up.
5550°F. Getting the right crust at that temperature, about two hundred degrees below a professional oven, is really tough. Really tough. I'm not quite ready to build a wood-fired brick oven, but it's really tempting to hunt for the right excuse.
